
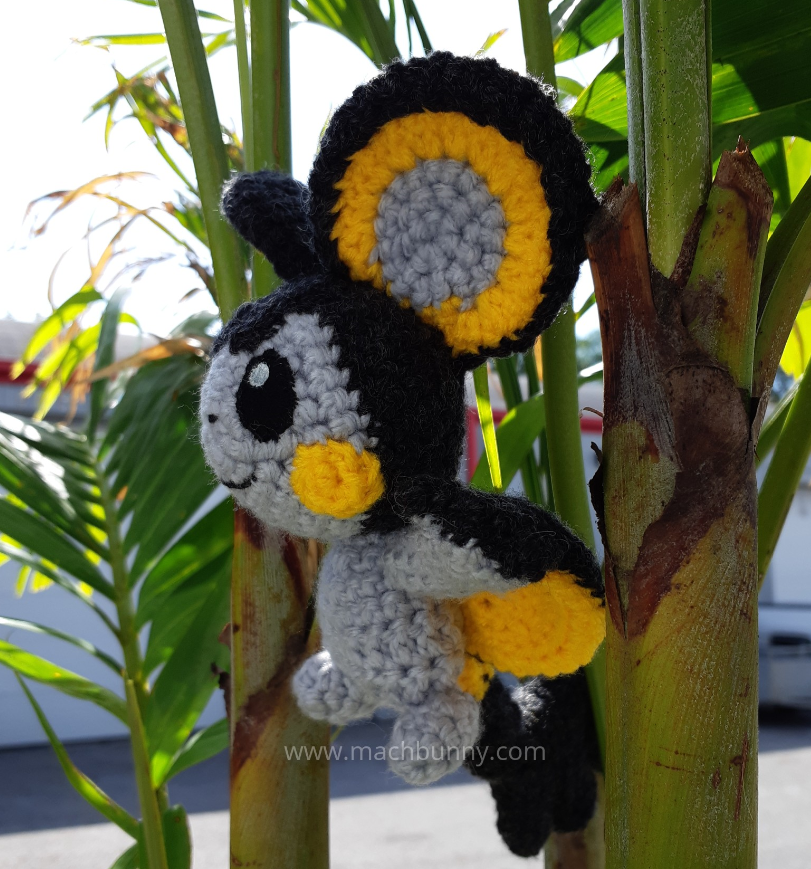
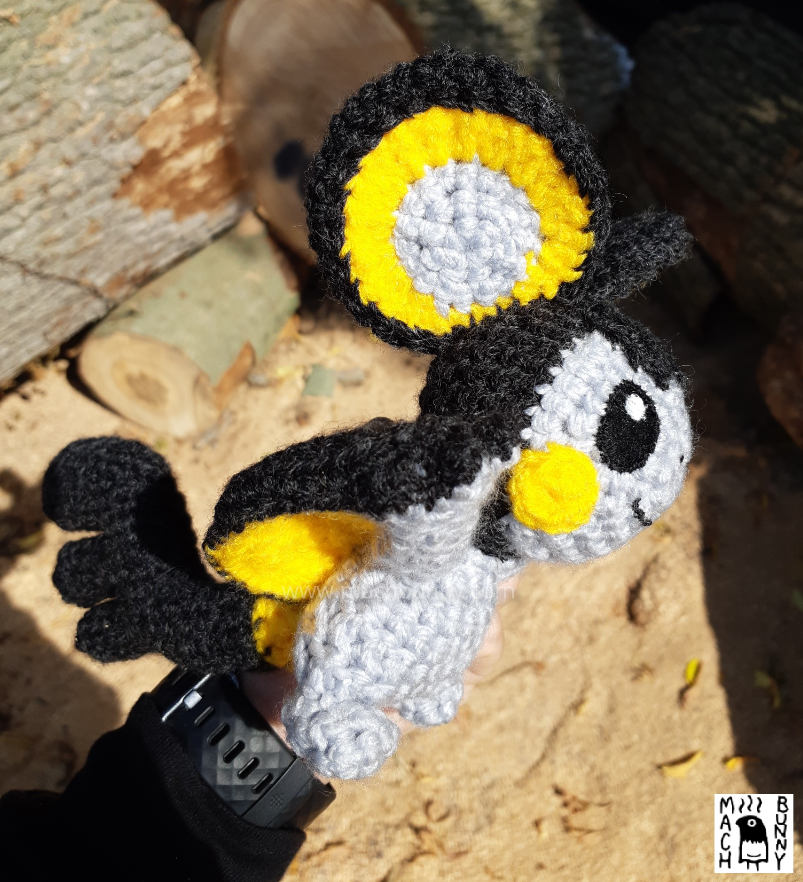
This week’s plush is emolga! I didn’t think there was much difference between pachirisu, but the votes last week proved how important the differences were.
Basically, last week was a vote between the light greyish-blue squirrel, or the light blue-grey flying squirrel. I did not think there would be such a preference for the flying squirrel, but I guess there are cuter things about it?

I personally am partial to the spikes on pachirisu’s tail, as spikes are one of my top favourite creature traits. I guess the dark grey ties up the colours on emolga rather nicely, but there’s something about emolga that reminds me of mighty mouse.


Going into this project, there didn’t seem to be any problems with the head. I even tried a new thing where I chained some triangles and incorporated it into the round; I was able to fasten it together in the second round by doubling it up with the layer. Once I painted the white in the eyes, you could see that it was turning out well.
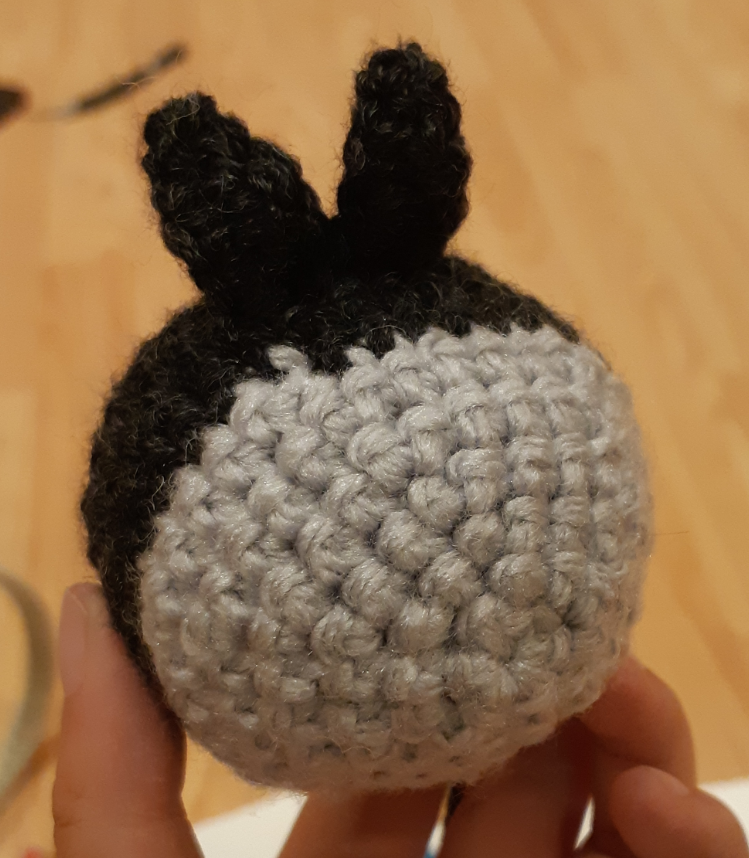


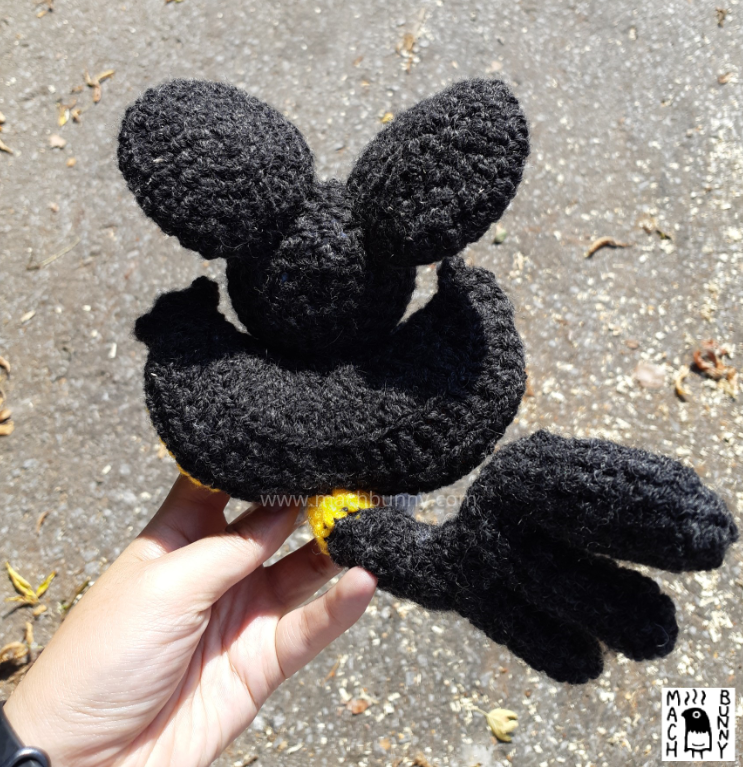
I had to make some adjustments while I was making the ears; I took away one section of the second round of yellow, so that the grey centre could sit close to the head. I also reduced the size of the ear backing to make it fit snugly around the inner ear. They looked very saucer-like when I finished them.

With the head mostly completed, I then worked on the body; the first one was a bit too chunky for my liking, so I made a smaller one. The feet were like making the smallest booties, where half of the round is continuous decreasing and the other half is regular crochets. I was aiming to match the size of my pikachu, but I think it was leaning towards being bigger.


For the arms, I was anticipating the two-toned look; I made 3 spikes for the fingers and purposely left it open on one side to meet with the back part of the cape. I don’t think it would have the same impact if the arms didn’t have the fingers showing.


By the time I got to the tail, it was close to midnight on monday; I usually get up for work at 5:30 a.m., so I was trying to get it done quick. I think instead of double crochets, I would have taken the time to do more of the lop-sided increase and decrease to achieve the flag shape taper to the base. Overall, I think it turned out fine.
With all the pieces put together, here are the final results:


Thanks for reading! This month is gonna focus on more Halloween-theme pokemon.

Is there a pattern?
LikeLike
please please please make a pattern!!! pleeeeeeeeeeeeeeeeeeease! THIS IS SO CUTE!!!
LikeLike