Completed: Pokemon-themed Wedding Cake Topper

A sculpture of a couple, one dressed in a pikachu costume and the other dressed in a charmander costume. The pikachu costume has purple flowers and a veil, and the charmander costume has a purple bow tie and top hat. They are standing on top of a heart-shaped platform.

About a year ago, I had been commissioned to make a wedding cake topper for a friend of mine. This is the first time I’ve ever made a full sculpture, complete with an armature – it was an interesting learning curve to tackle for the year.

Concepts

The cake topper was based off of a watercolour pic; the pic is of the wedding couple in pokemon onesies, and they wanted wedding accessories added on top.

The original concept art, an ink drawing that the client commissioned from another artist, vinylesque. It is an ink drawing of the couple in their pikachu and charmander costumes, with the one in the pikachu costume kissing the one in the charmander costume.

I drew some sketches so that I could get a feel for how it would translate in 3D:

Concept drawings, drawn with a blue ballpoint pen. The pictures are renditions of the ink drawing, visualized in 3D at different angles.

Once I had a working concept, I got the materials to work on the topper.

Materials

For the project, I used:

  • 6″ wooden base
  • 4 screws with flat tips
  • Thin-gauge craft wire
  • Thick-gauge hardware wire
  • Tinfoil
  • Cardboard
  • Super sculpey
  • Turner acryl-gouache paints
  • Golden gloss polymer varnish with uvls
  • Purple felt
  • Paper
  • White edging fabric
  • Craft foam (to cover the bottom)

Process

First I made an armature of each person, and bulked it out with tinfoil. Every so often I would wrap the packed tinfoil with the thin wire to keep it together; it also allowed the super sculpey to grip onto the tinfoil.

The first area to be covered with sculpey was the body:

A work-in-progress photo, depicting the unpainted sculpts of the couple. The bodies are covered with sculpey and the heads are not yet completed. The heads are tinfoil balls wrapped in wires.

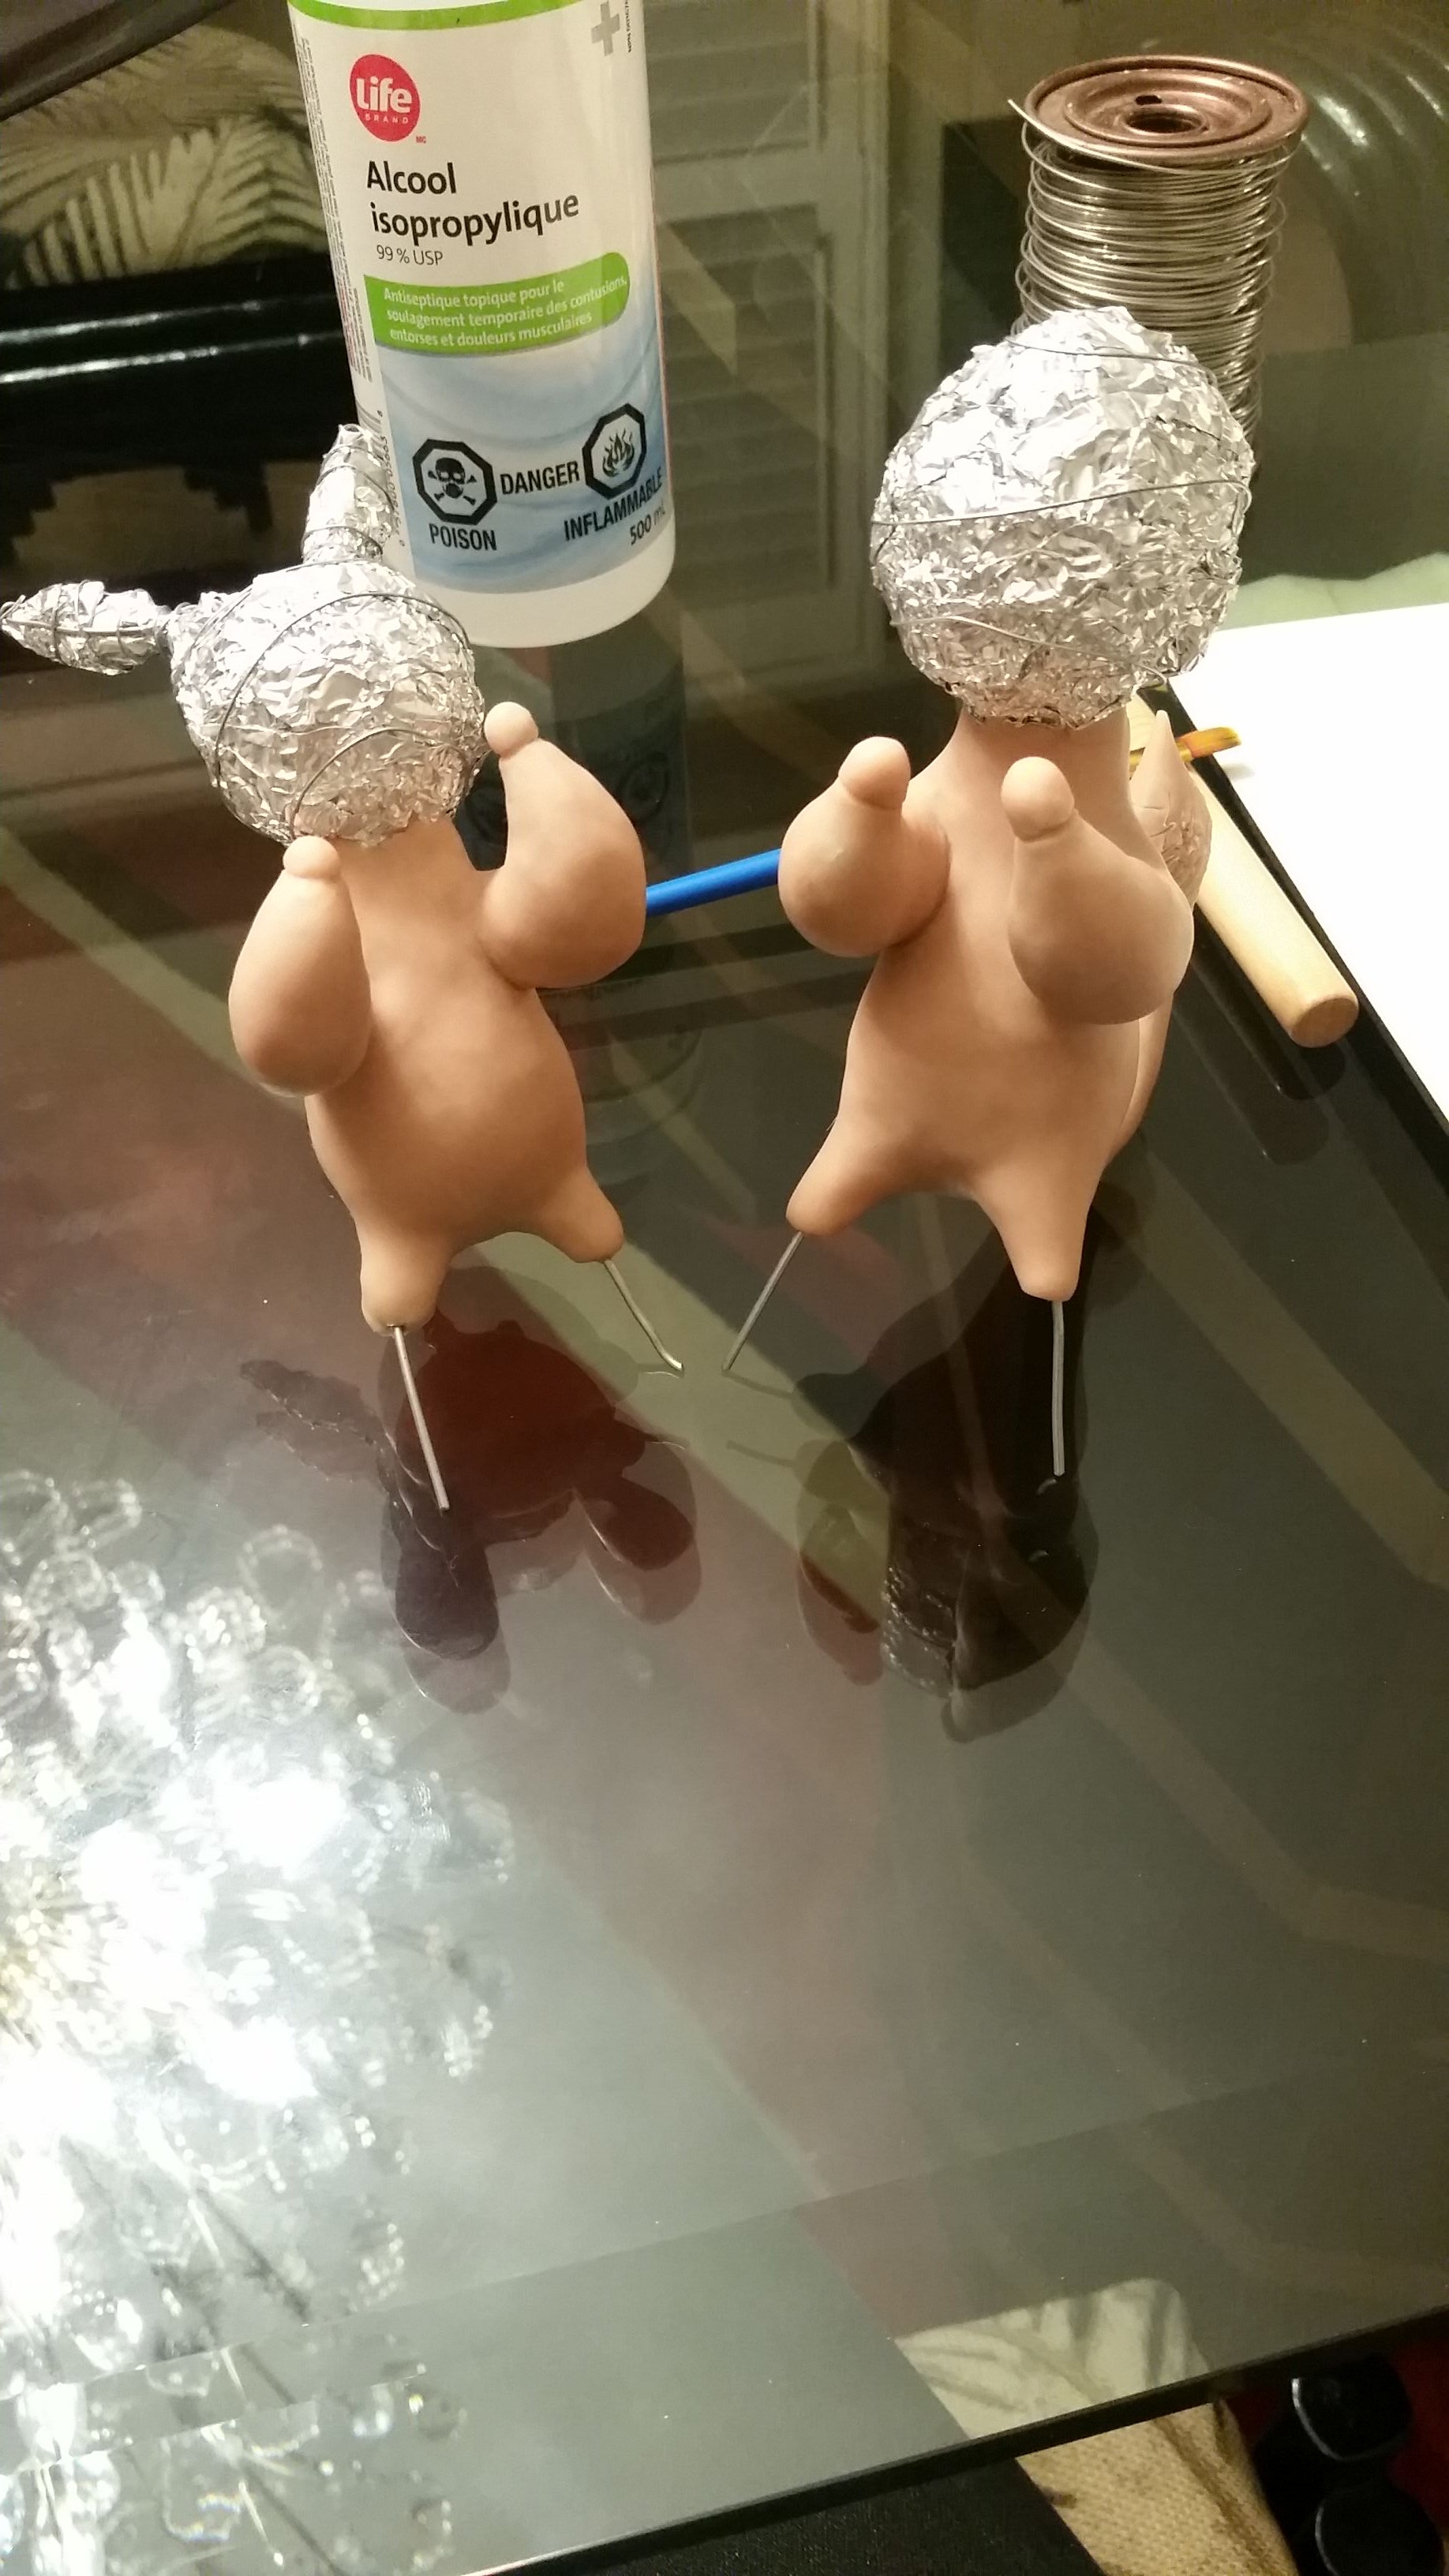
The bodies were smoothed out and heat set with a heat gun before I started working on the heads. I ended up bulking out the heads further with tinfoil before covering them with sculpey.

A work-in-progress photo, depicting the unpainted sculpts of the couple. The bodies are covered with sculpey and resemble the couple in the ink drawing.

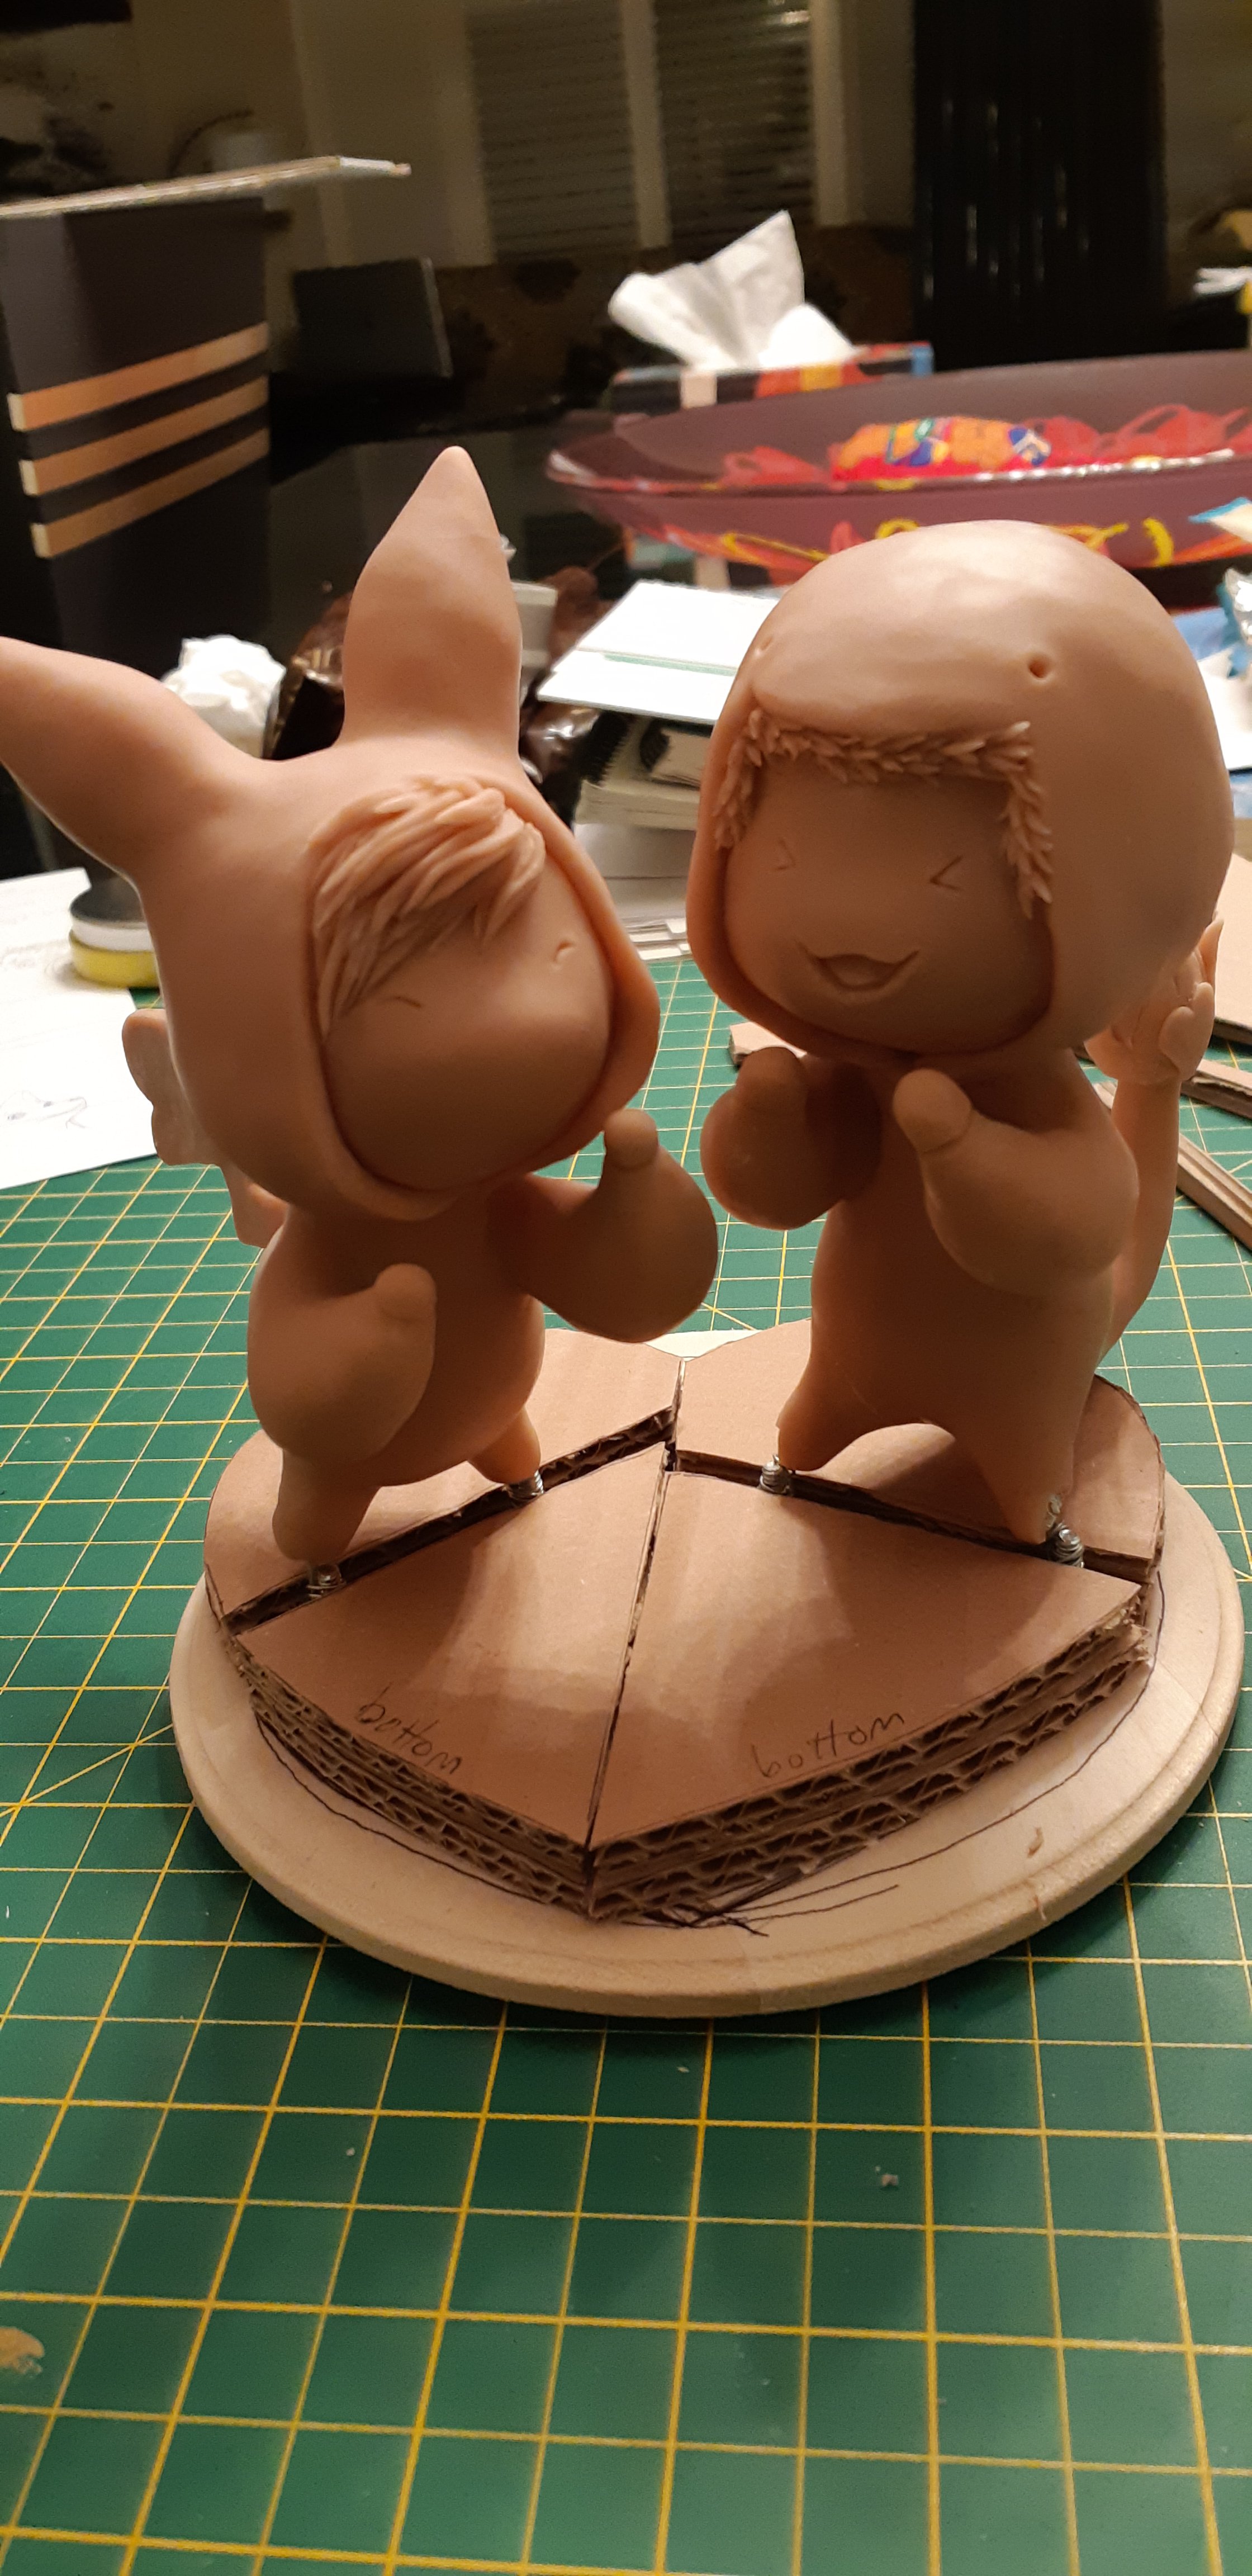
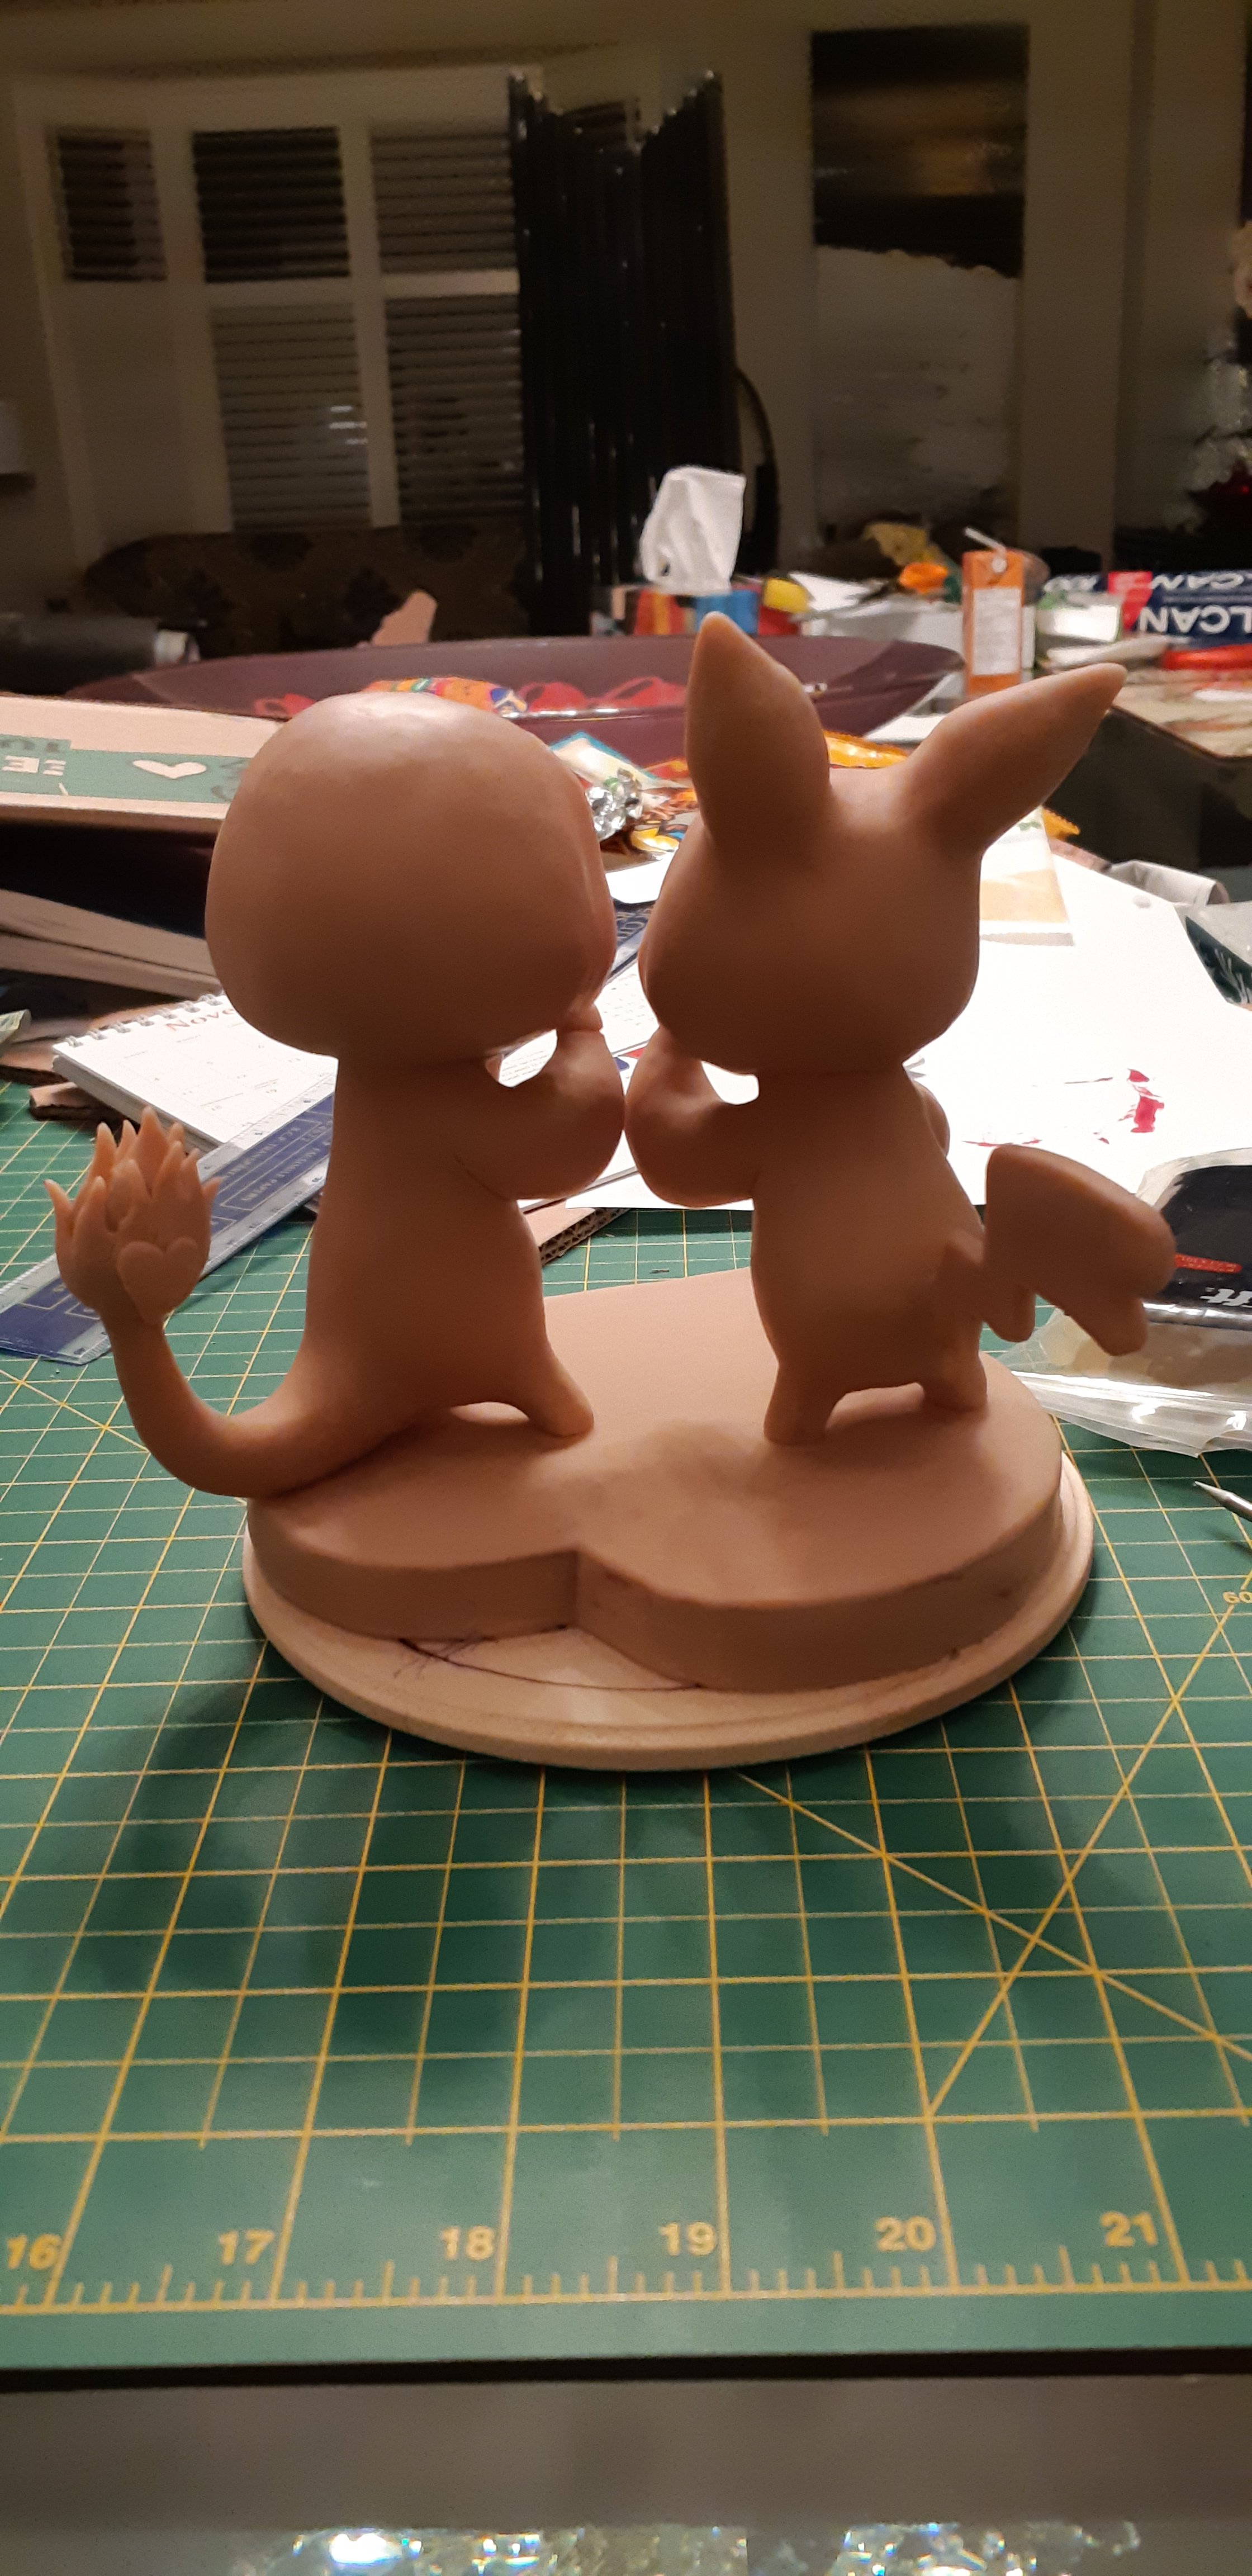
If I had known better, I would have focused on fastening the armature to the base before adding the sculpey on. At this point I had already heat set everything, which made it prone to cracking at the feet.

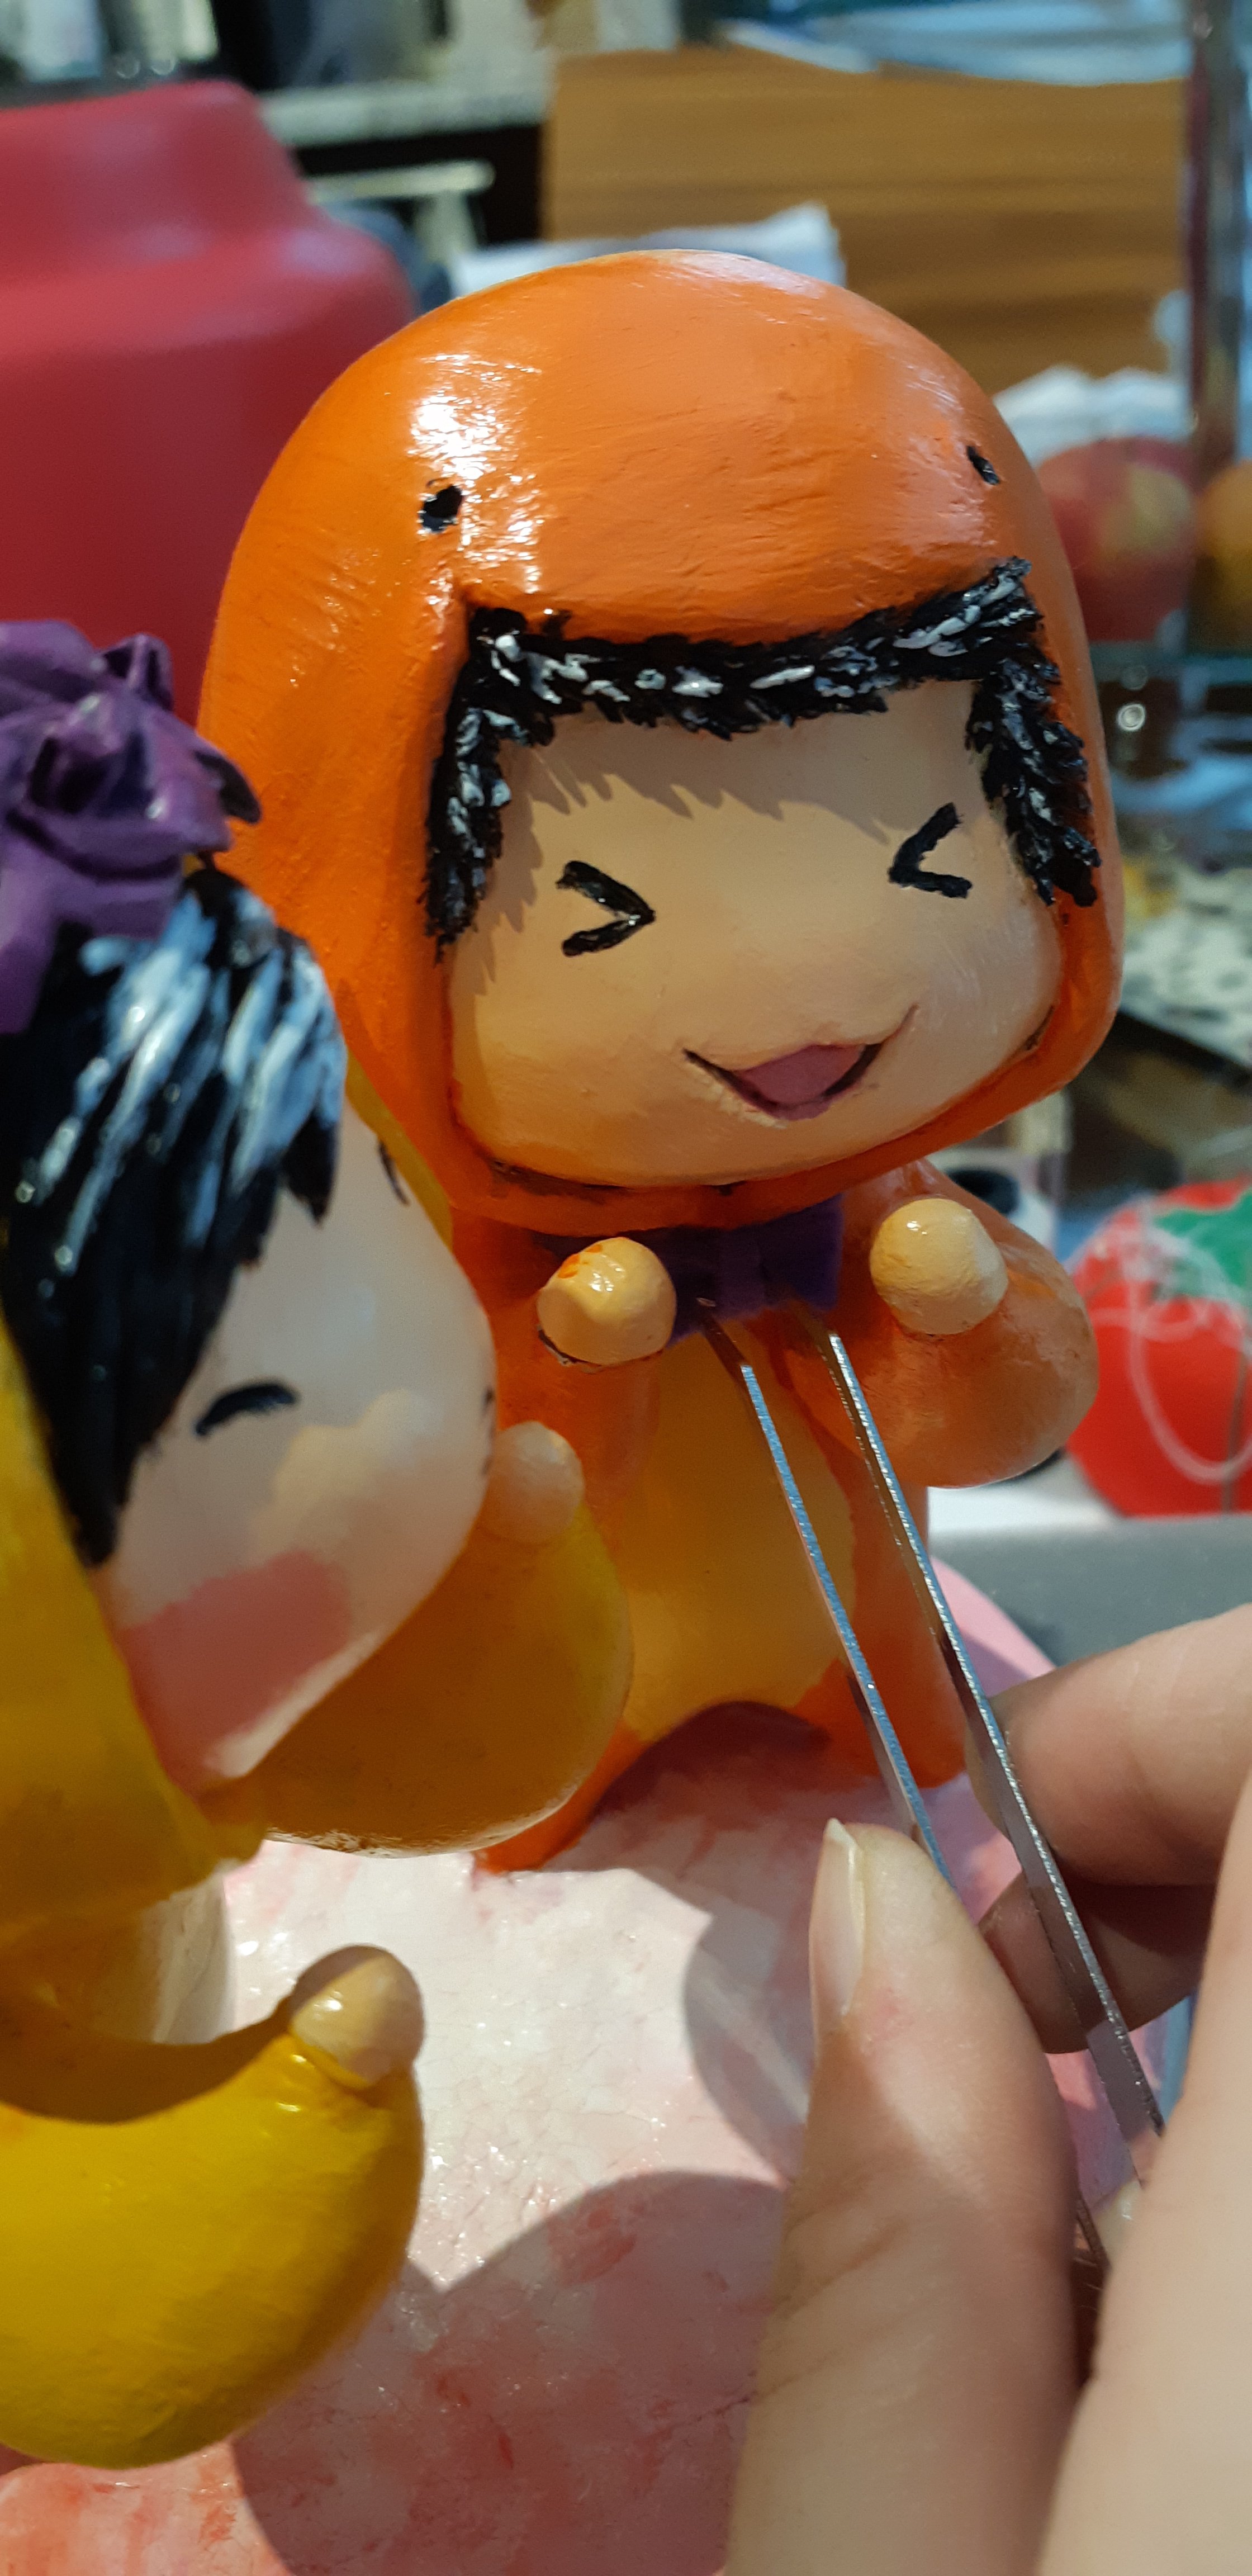
Eventually I settled with trimming the wire at the bottom of the feet to even it up, and then fastened the wire onto the screws, which were drilled into the wooden base:

A work-in-progress photo, depicting the unpainted sculpts of the couple. The bodies are covered with sculpey and resemble the couple in the ink drawing. They are now fastened to the wooden base.

I added a heart-shaped platform to hide the screws and wires. Once everything was covered with sculpey, I had used the heat gun to set all the parts together:

A work-in-progress photo, depicting the unpainted sculpts of the couple. The bodies are covered with sculpey and resemble the couple in the ink drawing. They are fastened to the base and have 4 cardboard segments that assemble to form a heart platform.
A work-in-progress photo, depicting the unpainted sculpts of the couple. The bodies are covered with sculpey and resemble the couple in the ink drawing. They are fastened to the base and have a heart-shaped platform with sculpey smoothed out on top.
A work-in-progress photo, depicting the unpainted sculpts of the couple. The bodies are covered with sculpey and resemble the couple in the ink drawing. This is the photo of the back of the sculpture.

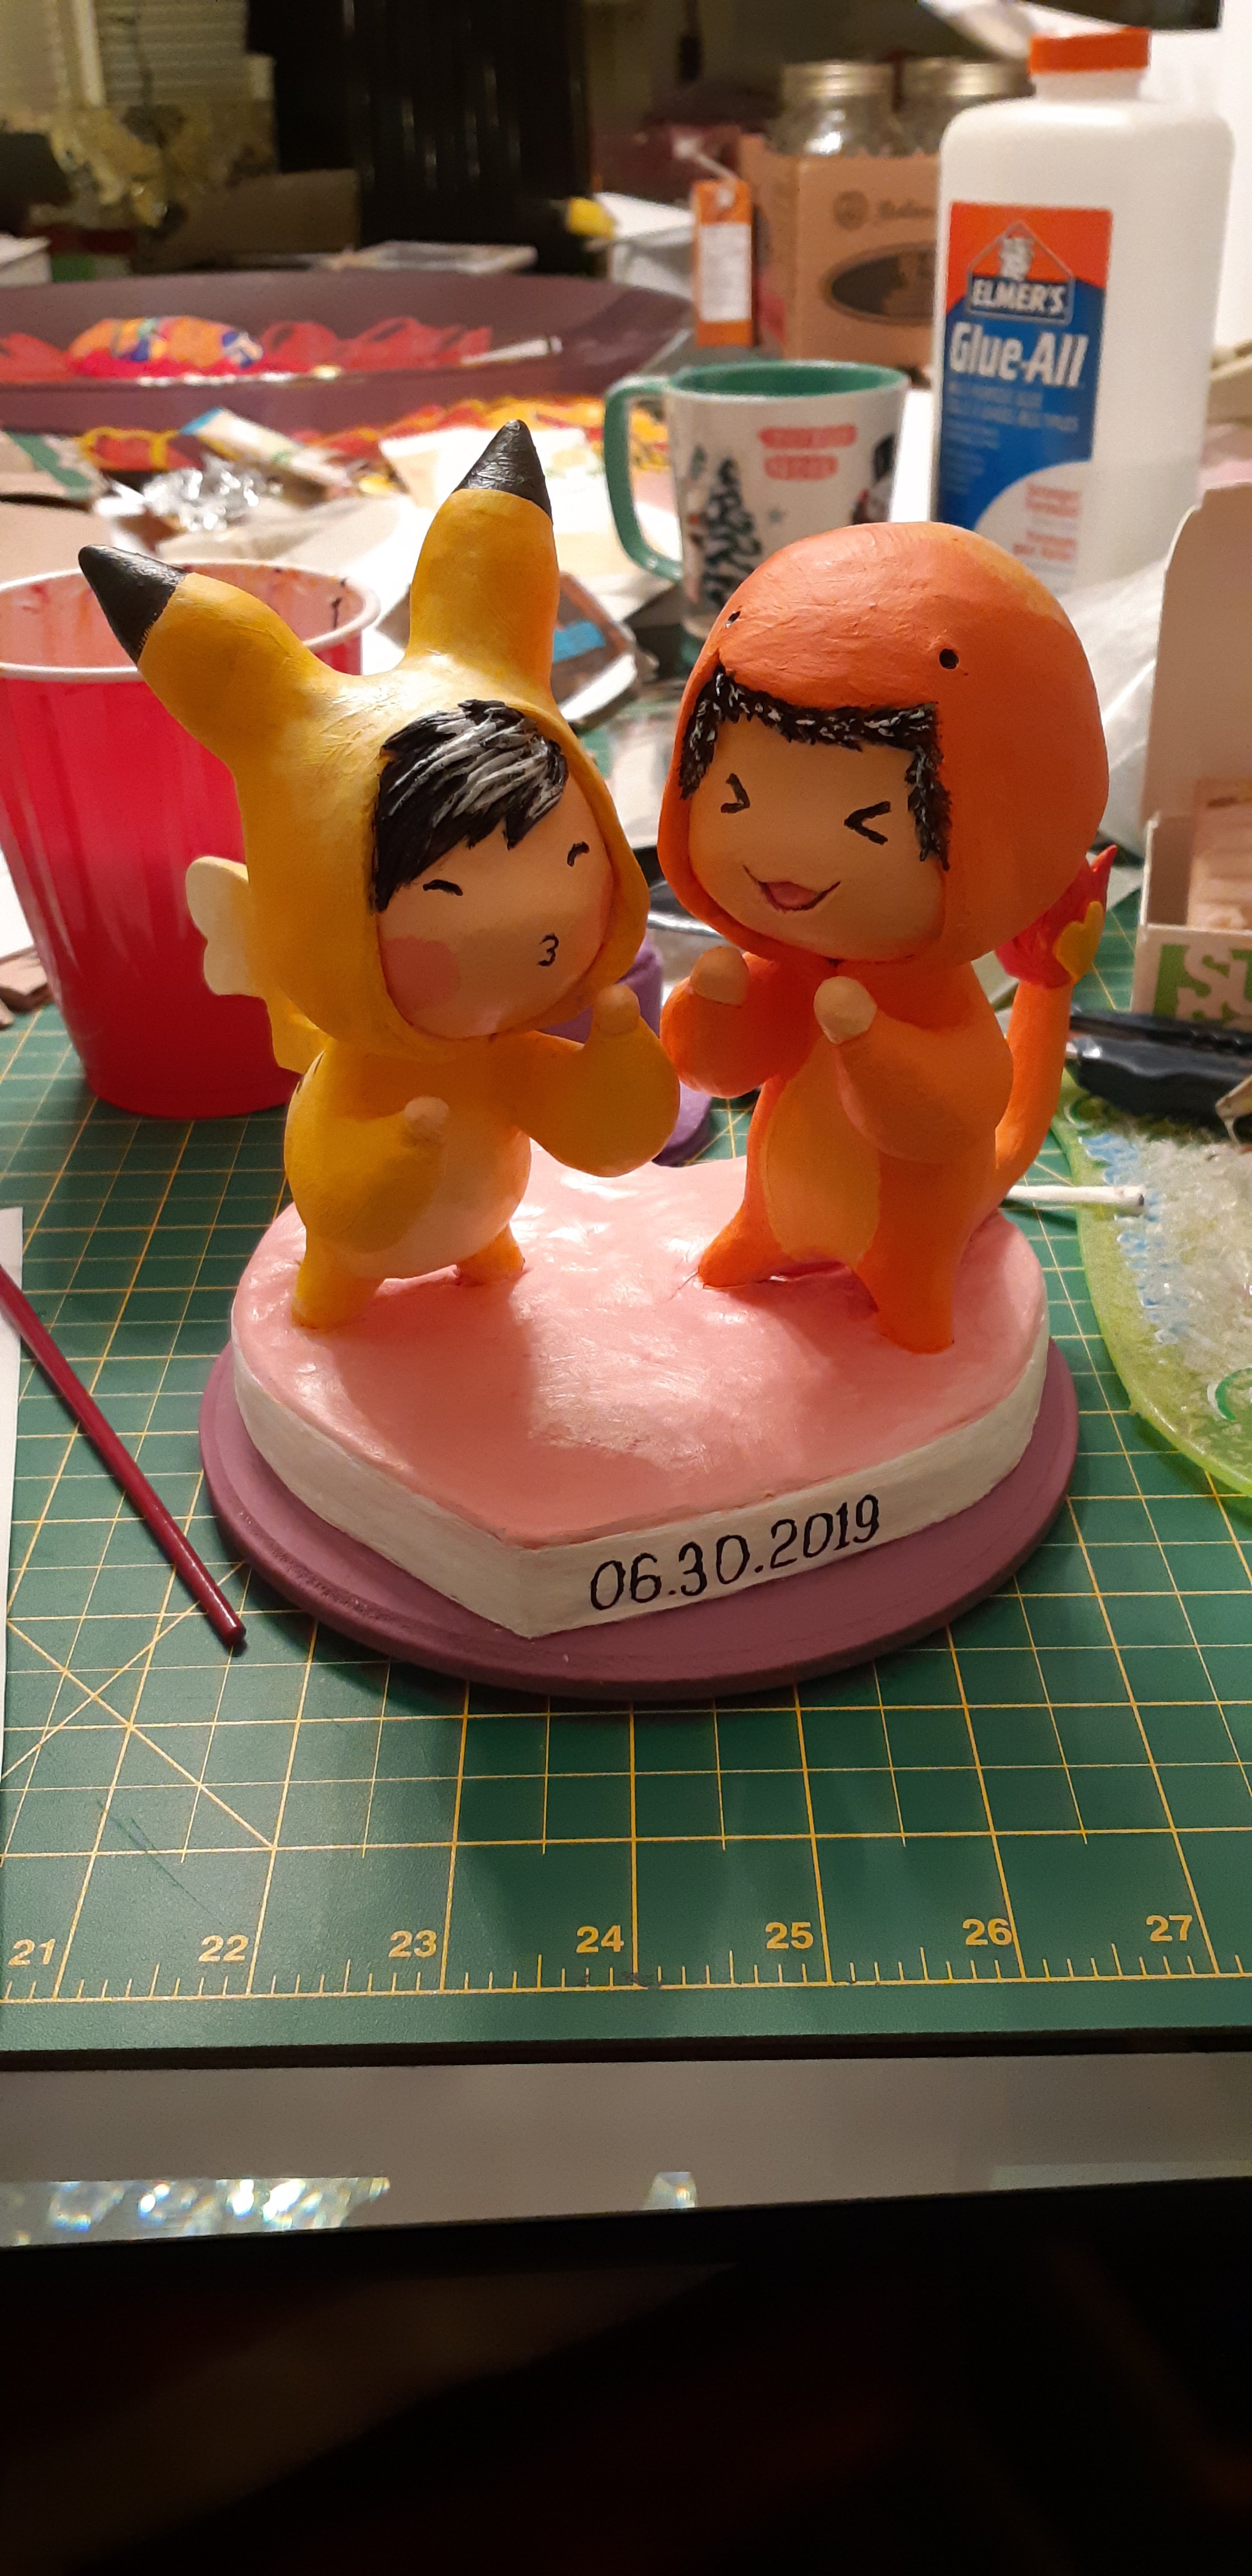
I used the Turner acryl-gouache paints for the entire sculpture. The wedding colour theme was purple and blush; they were incorporated into the base platform colour.

A work-in-progress photo, depicting the sculpts of the couple, painted with gouache-acryl paint.

In the meantime, I made a tiny snake out of super sculpey to test the paint and the Golden varnish; it turned out to be ok to use on the acryl-gouache. I applied two coats of varnish, allowing it to dry at least 6 hours between coats.

A mini test snake sculpture, painted with Gouache-acryl paint and is ready to have a coat of varnish tested on it.

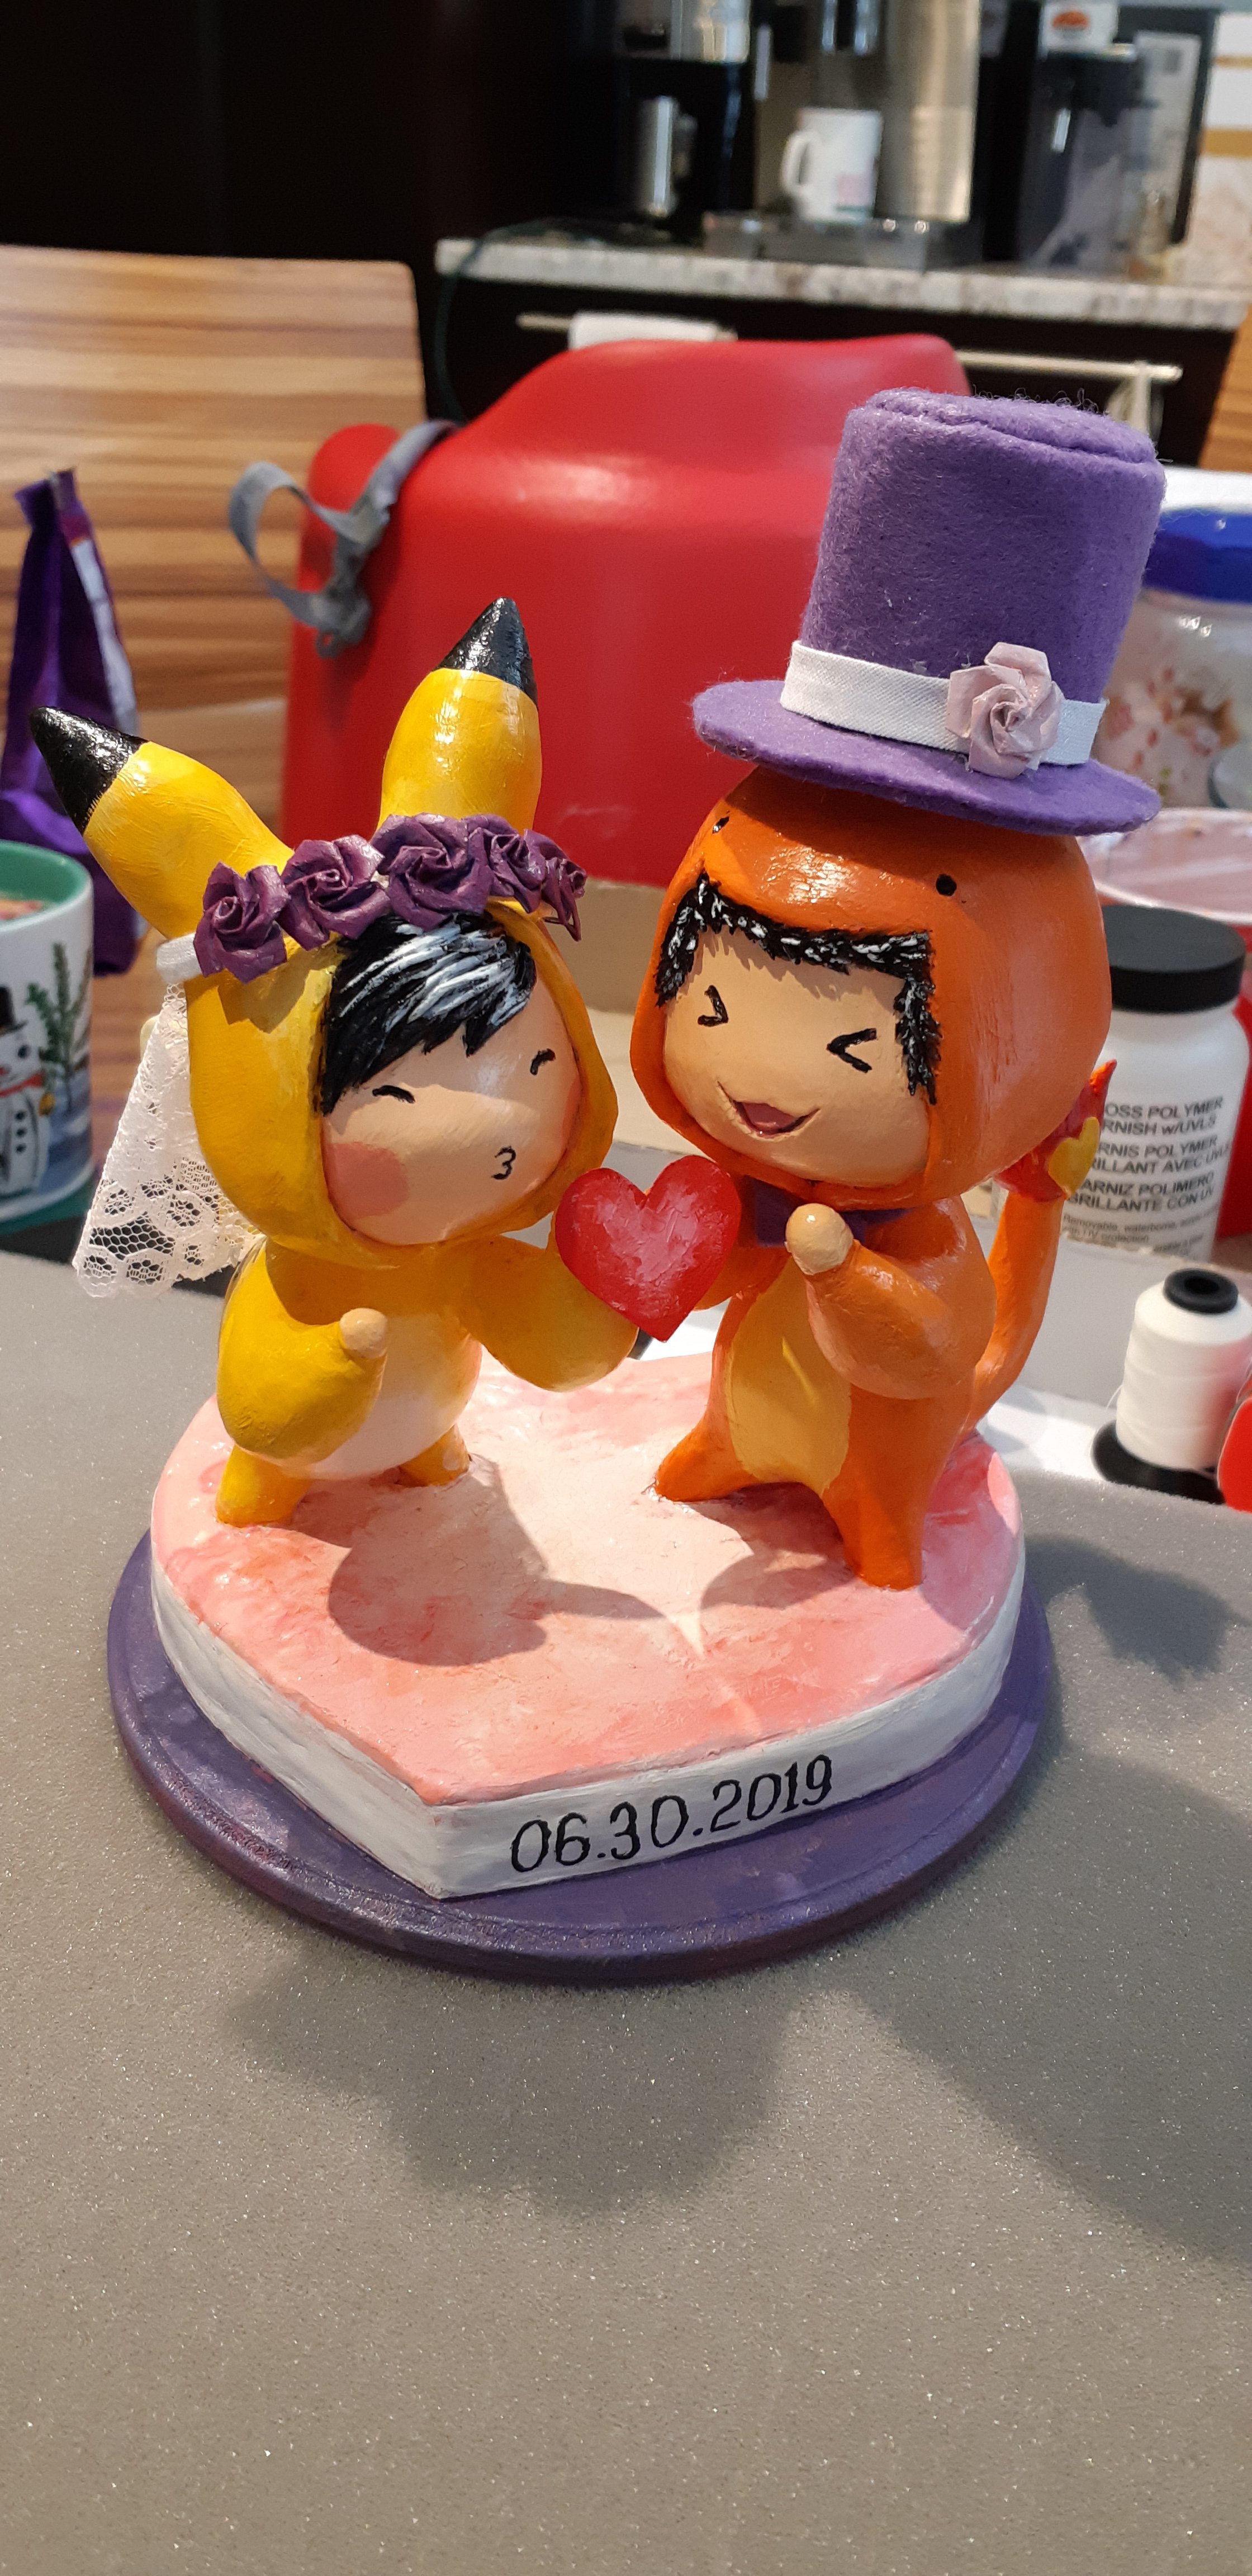
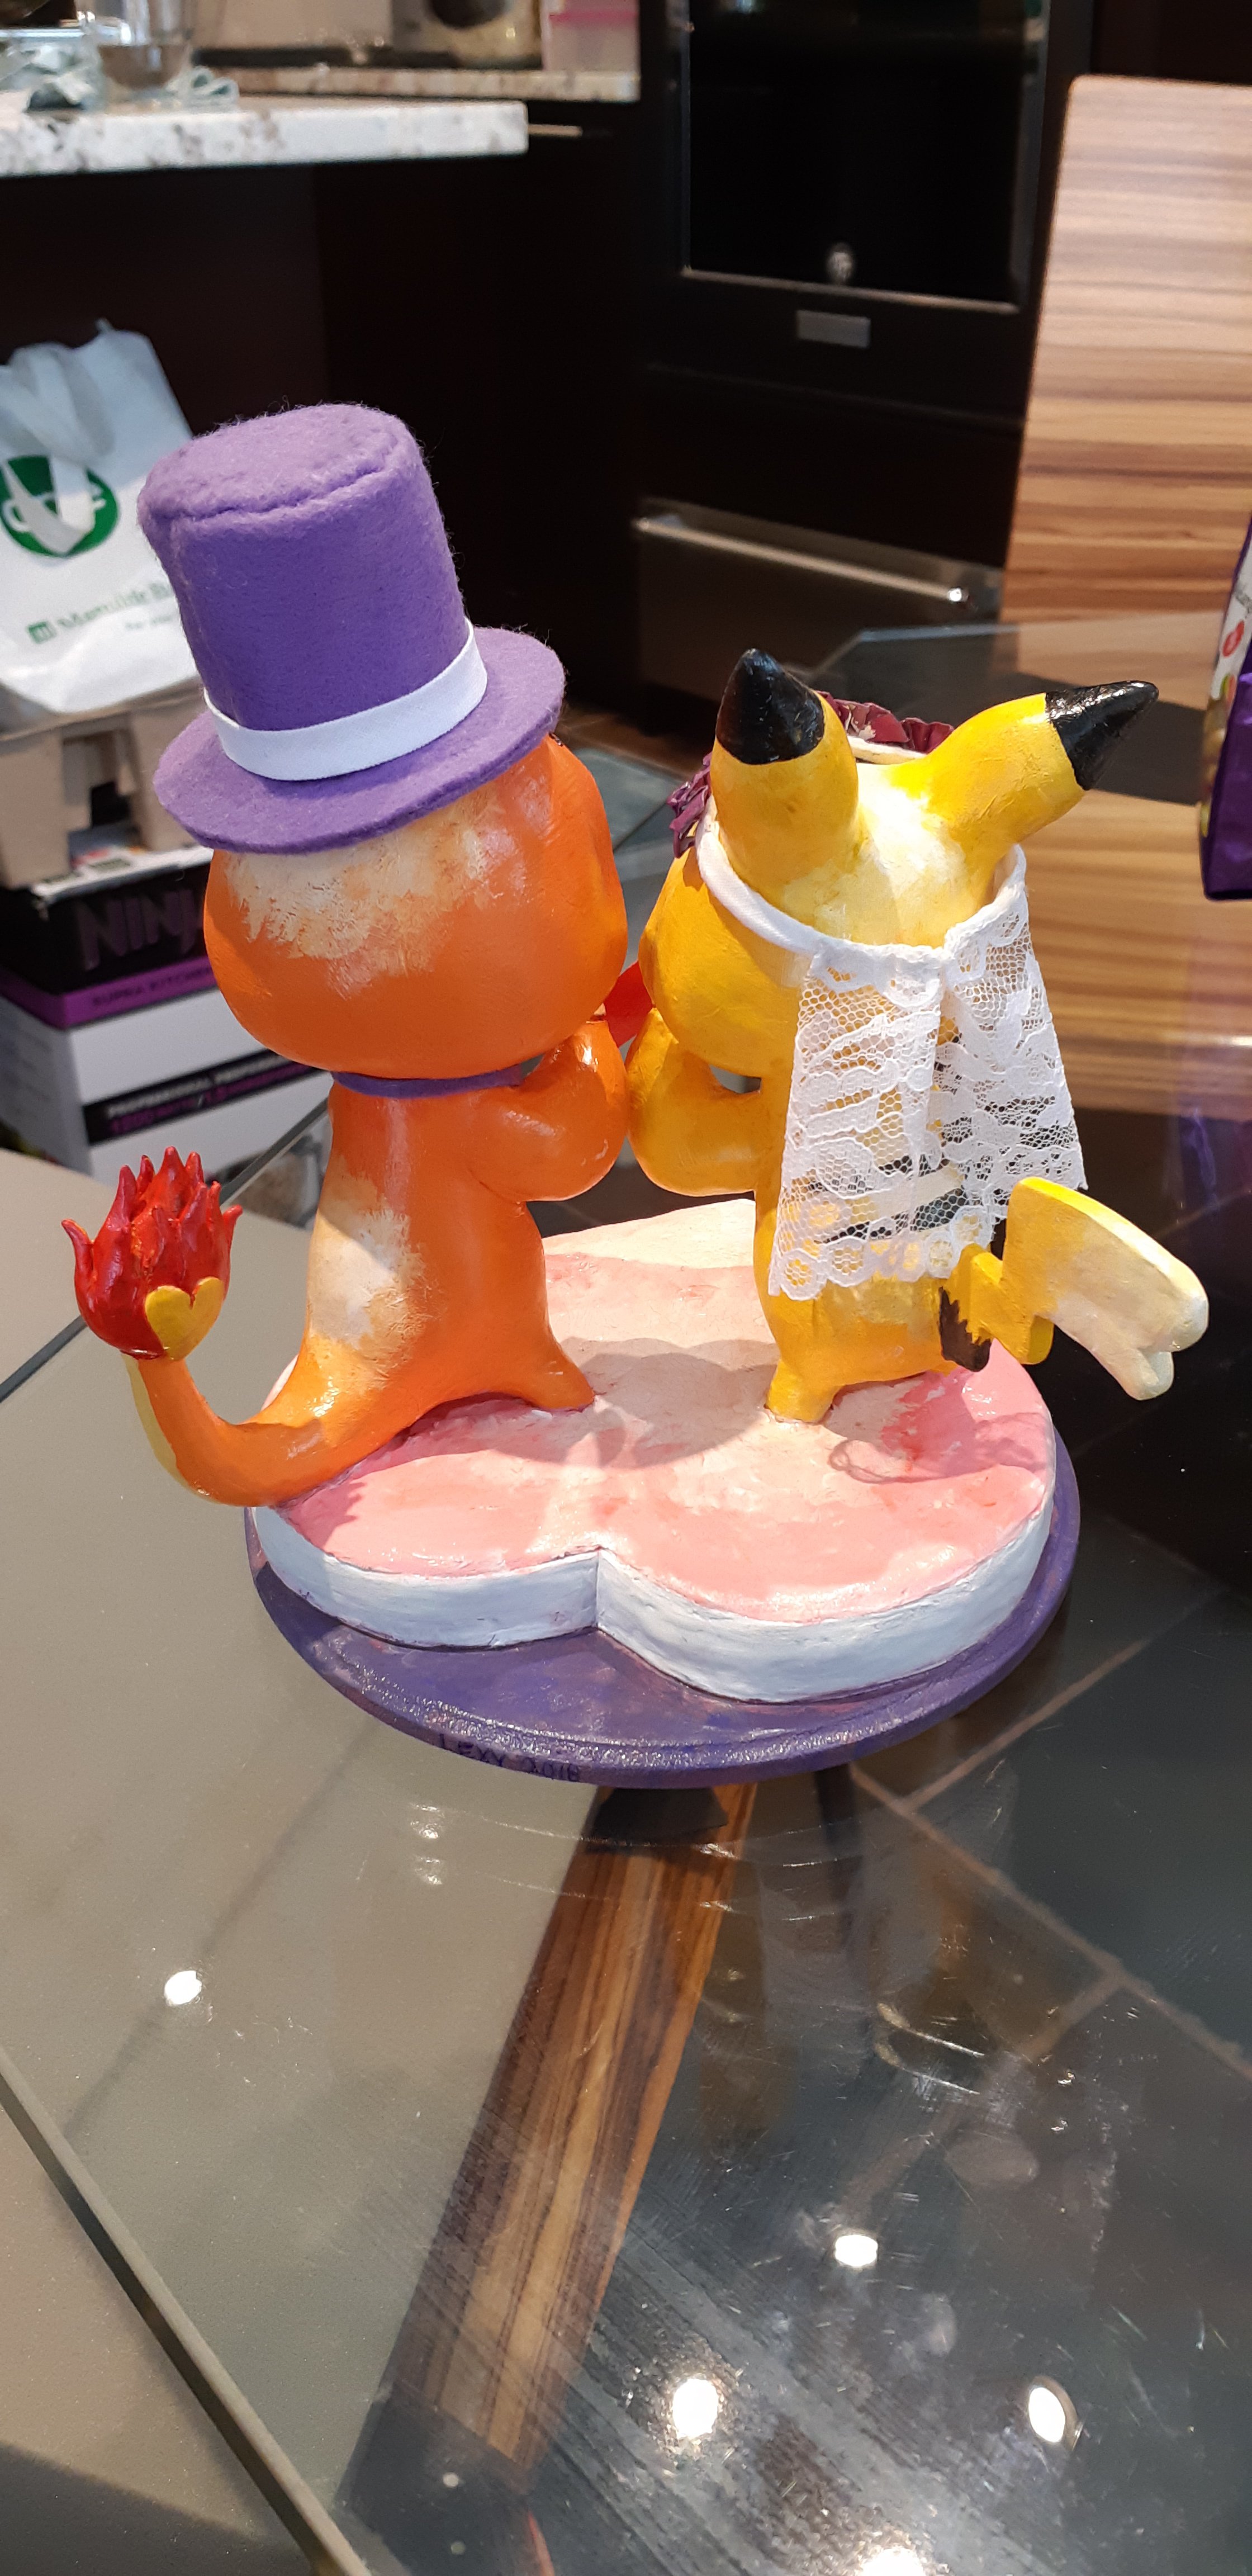
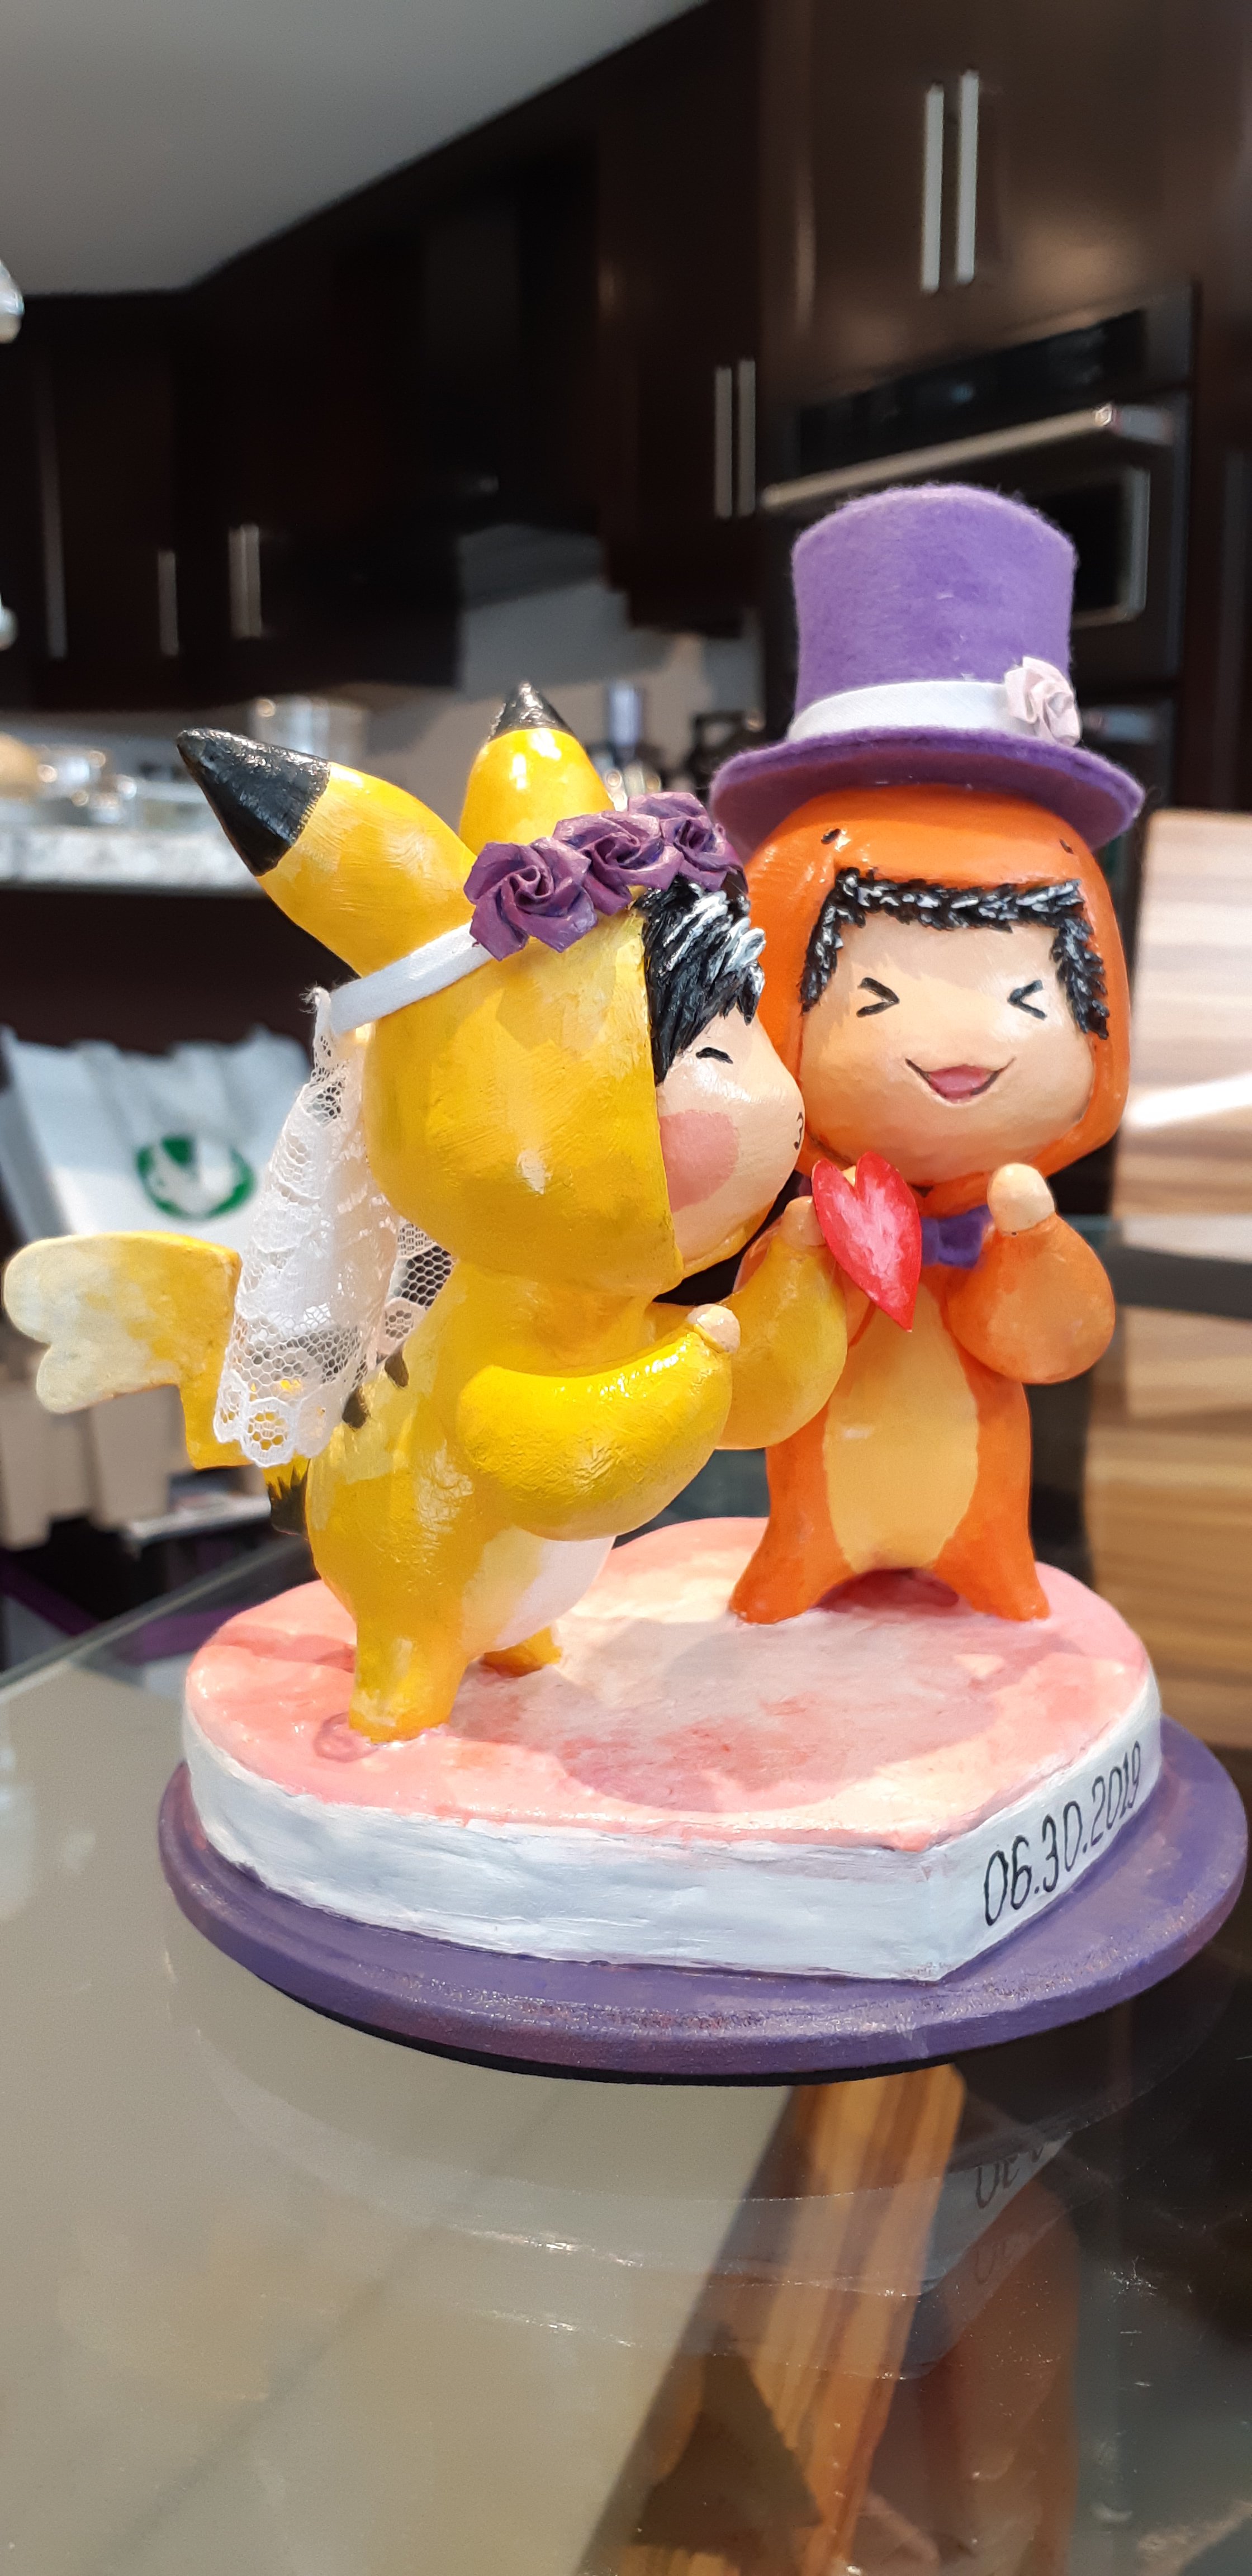
Next up was to make the wedding accessories; I made a top hat, bow tie, and a flowery veil:

A work-in-progress photo, showing the wedding accessories: the purple flower band for the veil, the pieces needed for the top hat, and the pieces needed for the bow tie.
A work-in-progress photo, showing the bow tie was glued onto the charmander suit using a pair of tweezers.

These were stitched and hot glued together, and then were hot glued onto the sculptures. The final result:

The same completed picture described from the beginning - it is the final result of the wedding cake topper.
This is the completed sculpture, showing the back. You can see the pikachu and charmander tails, as well as the veil and top hat.
This is the completed sculpture, showing it at an angle to resemble the kissing scene in the ink drawing.
A top-down view of the completed sculpture. You can see the heart-shaped platform.

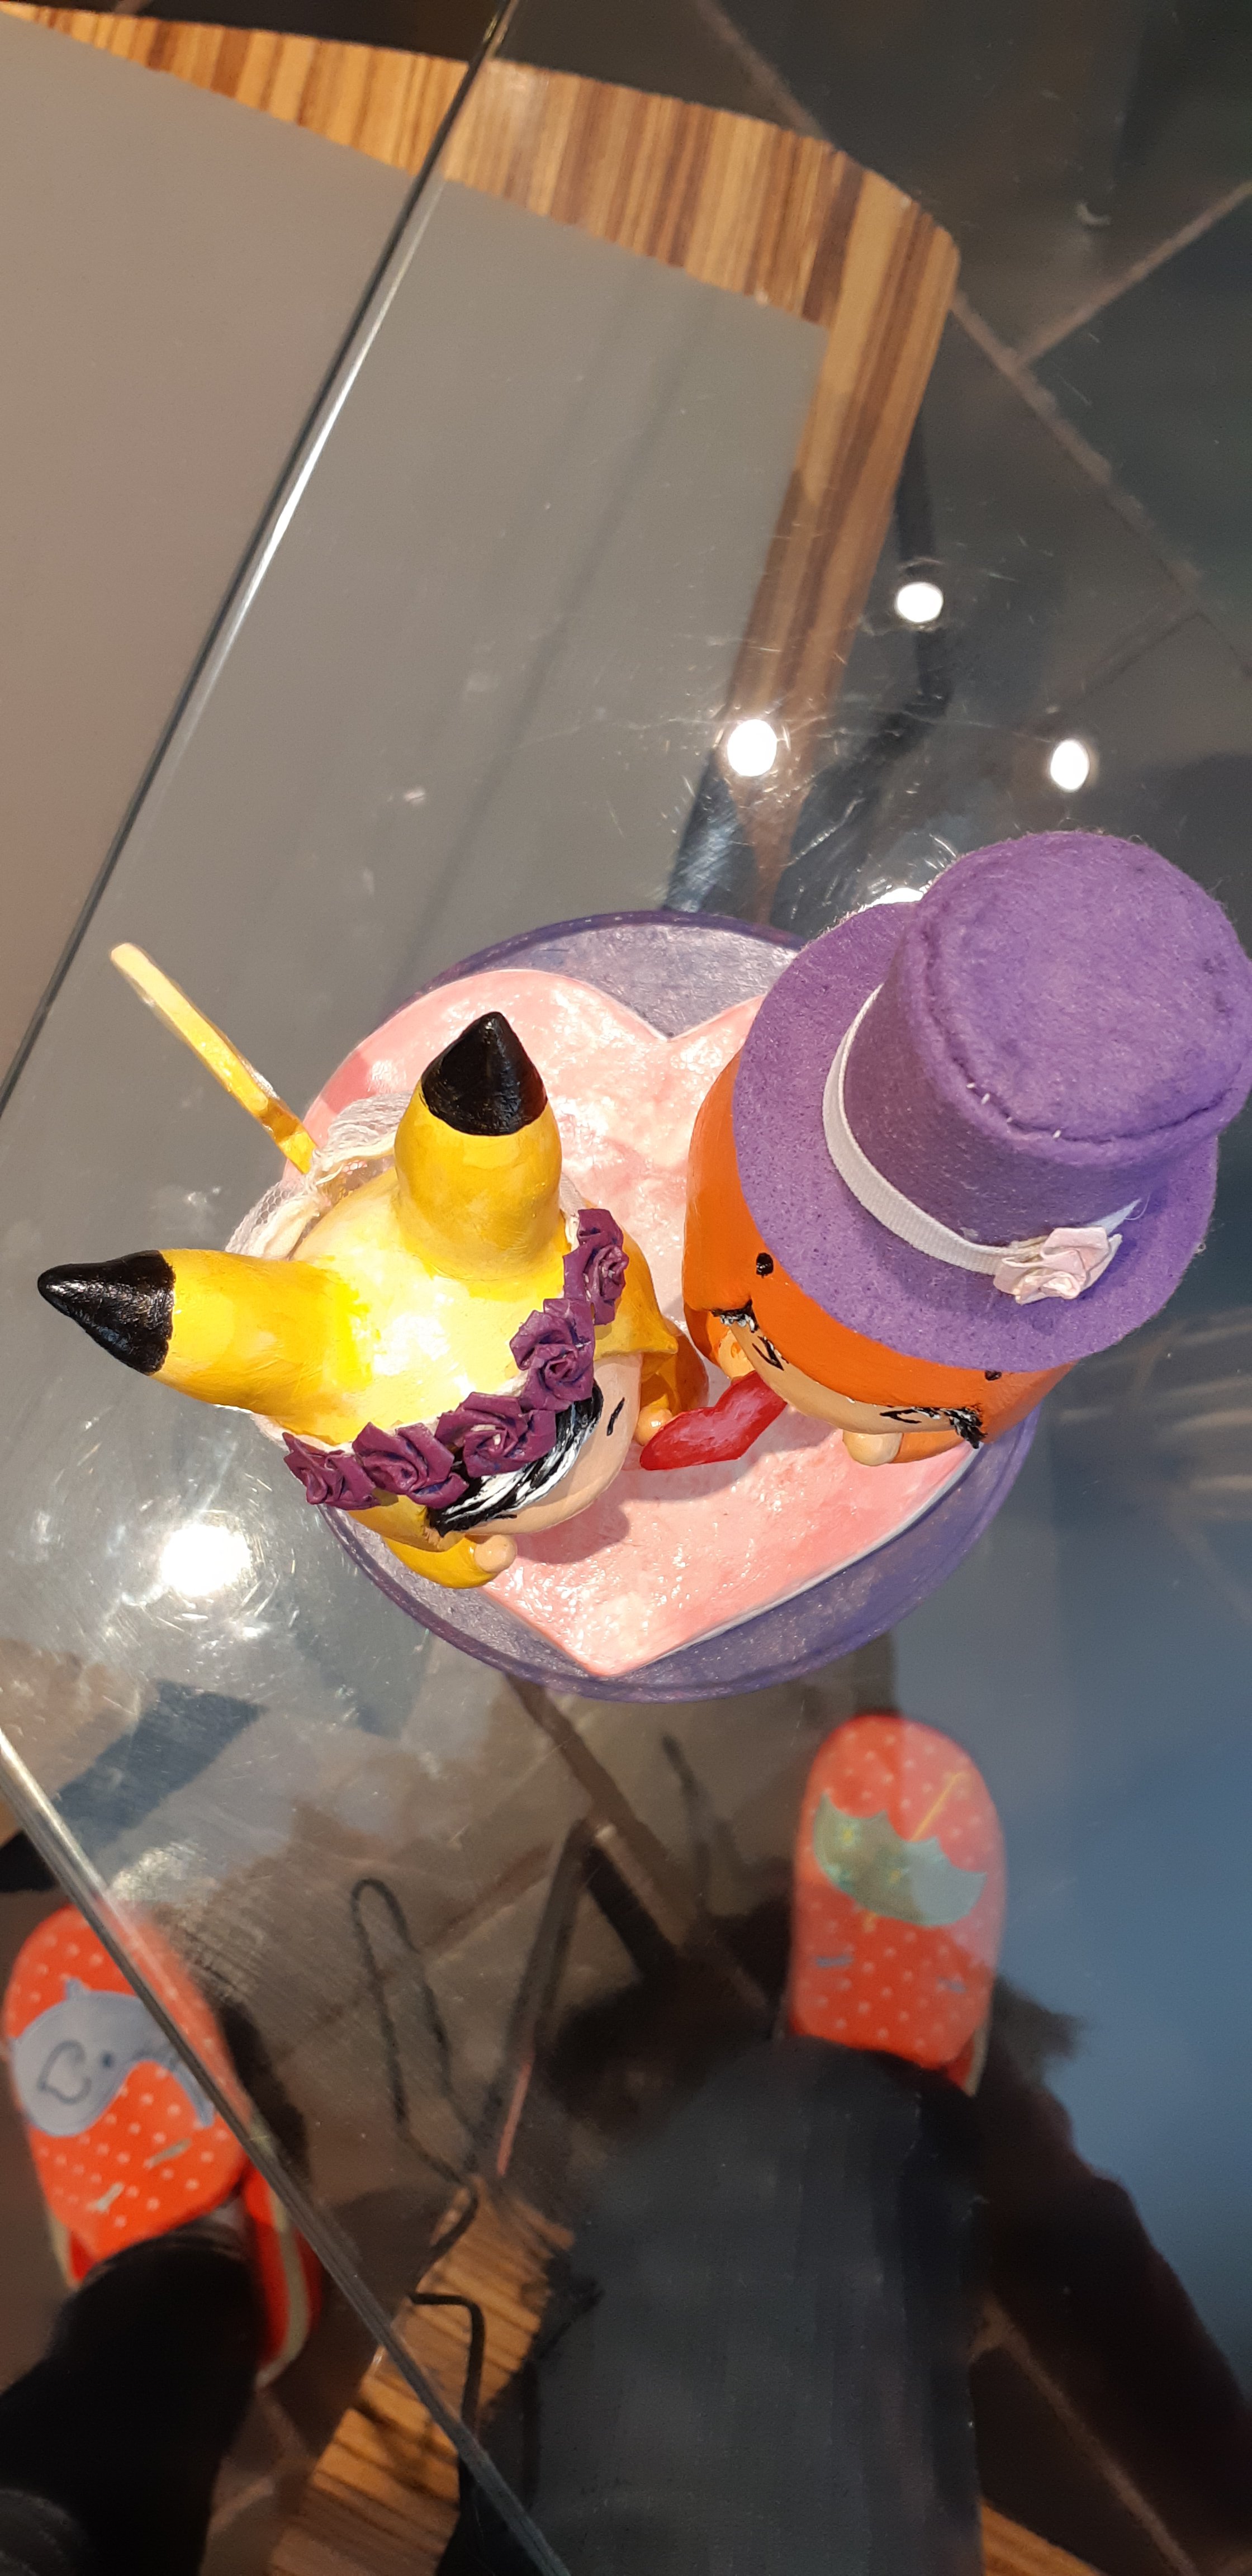
Thanks for reading! I hope to share more projects soon.

Advertisement