
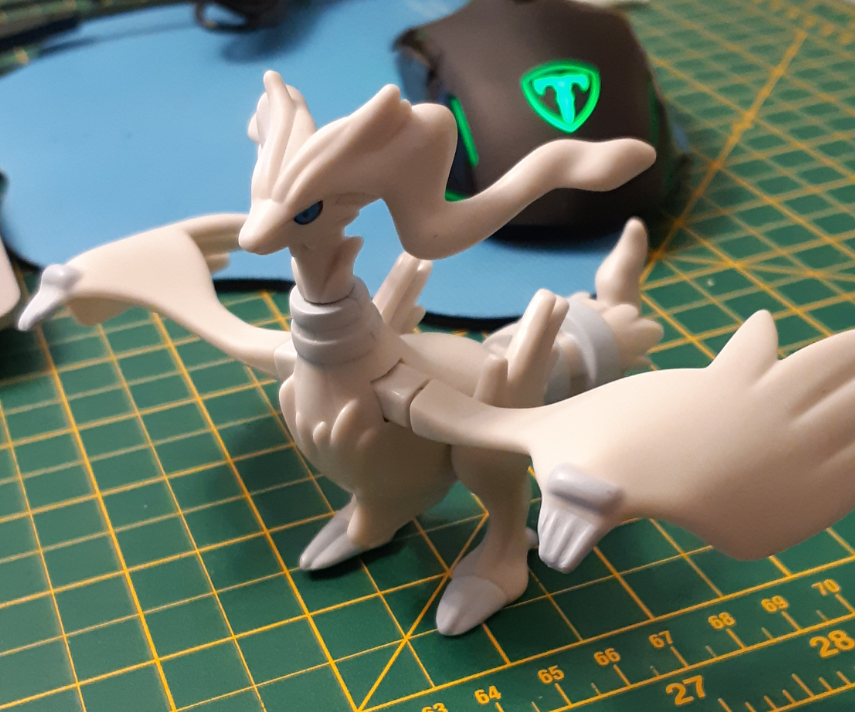
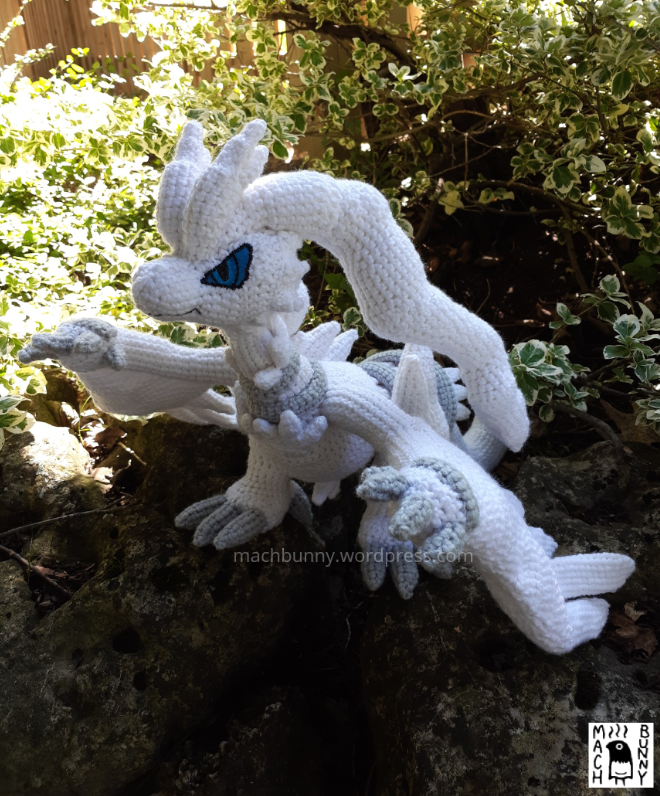
This week, I bring you last week’s plush, Reshiram! As monochrome as it is, it certainly was not as simple to make.
I had severely underestimated how long each detail would take, as well as how many outings I would end up going to during these warm weekends. I also underestimated how busy I was going to be at work, but usually that doesn’t bog me down; it’s just that time of year when summer fun takes over.
I had another pokemon toy to work off of; this time it was one from Macdonald’s. The details may have been melded a bit, but the overall shape was there.
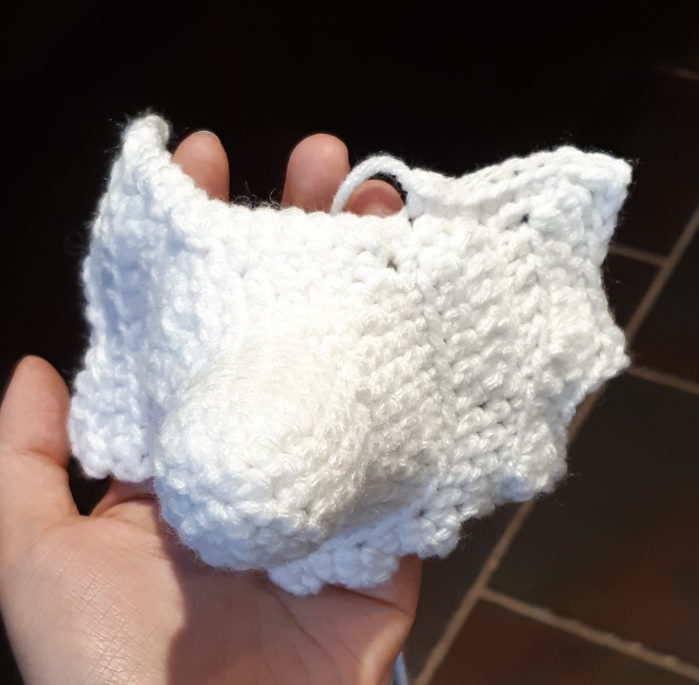
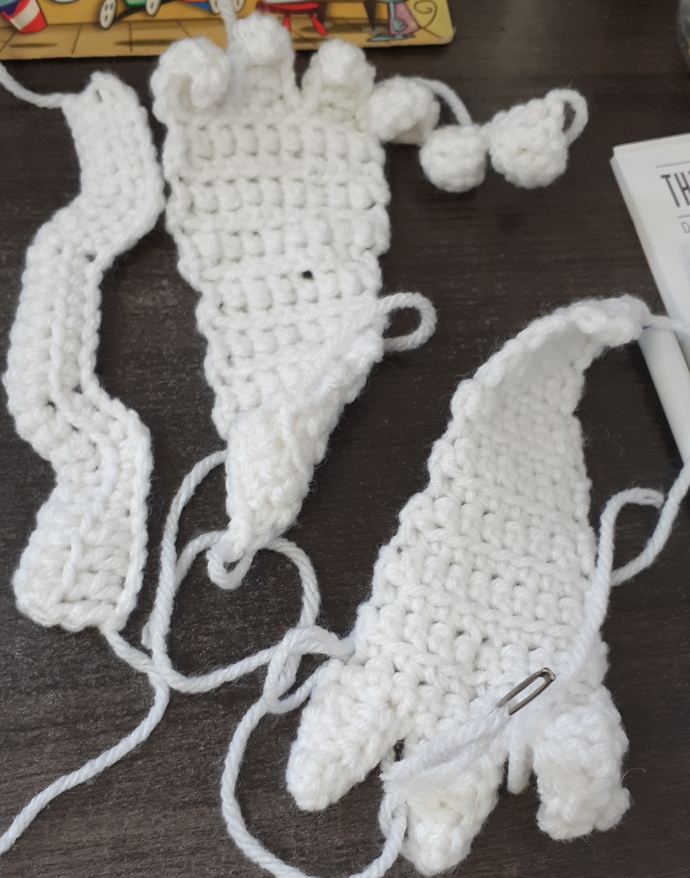
I broke the parts down into a few categories: base shapes, fluffs, and silver parts. Each category broke down further into parts like the head, arms, neck fluff, silver rings, etc. There’s something like 25 unique pieces and that does not include the repeat parts or the branched-off areas.
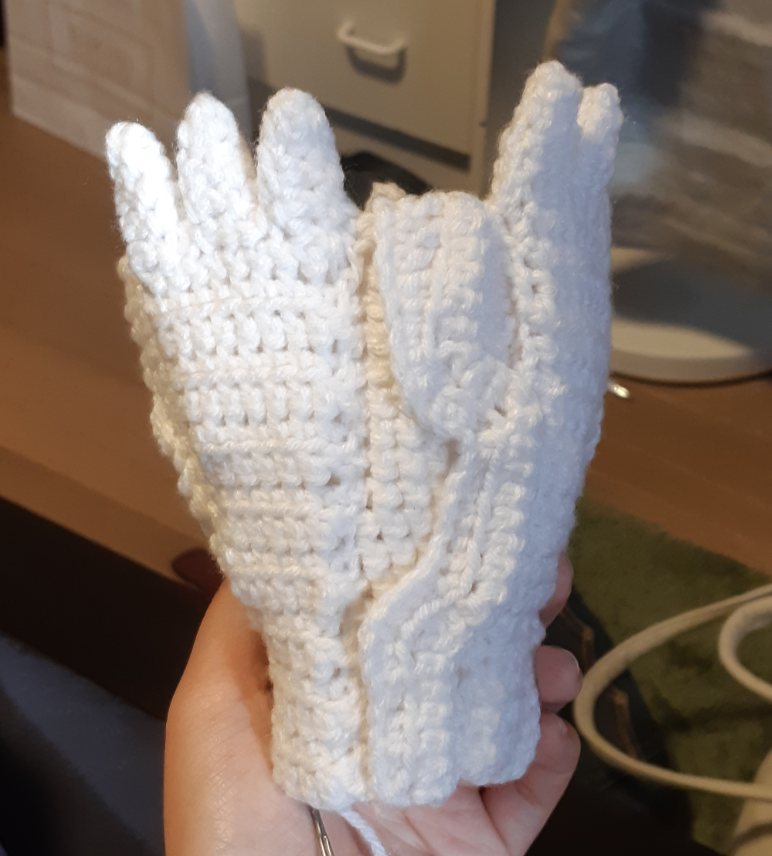
The head base was made up of two pieces, with the back of the head, neck and body as one piece and the face as a separate part. The arm base and inner tail parts were made soon after.

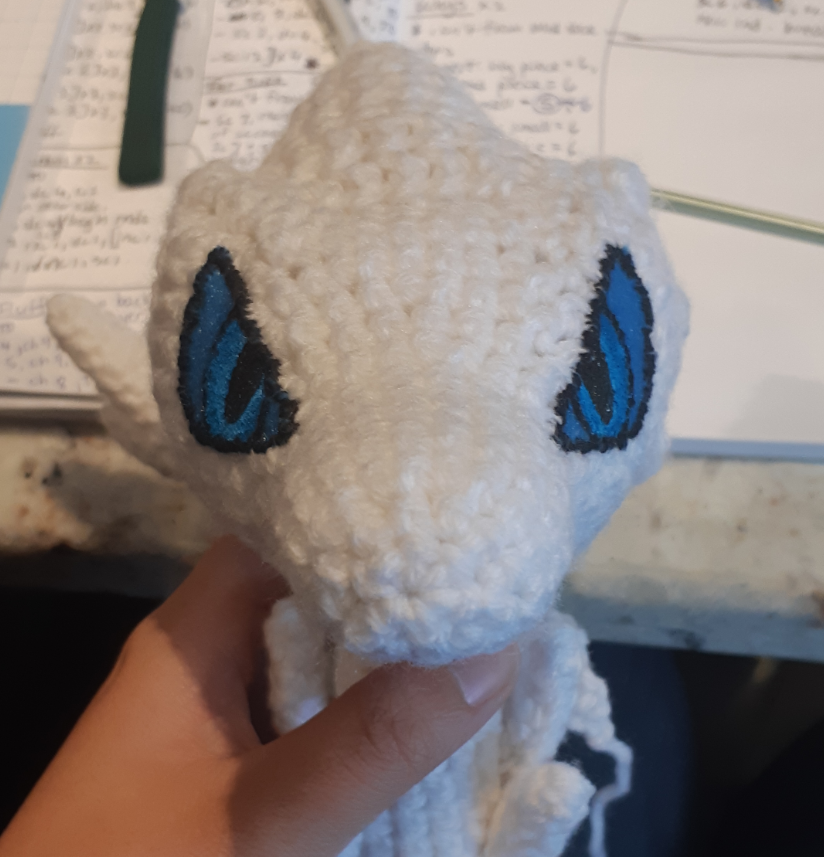
When I made the eyes, I thought that the pupils were white and began to paint on my already-blue felt; I looked at some more art and realized it was all blue! Luckily I had blue paint to cover it and it actually turned out better than if I had painted with black only.

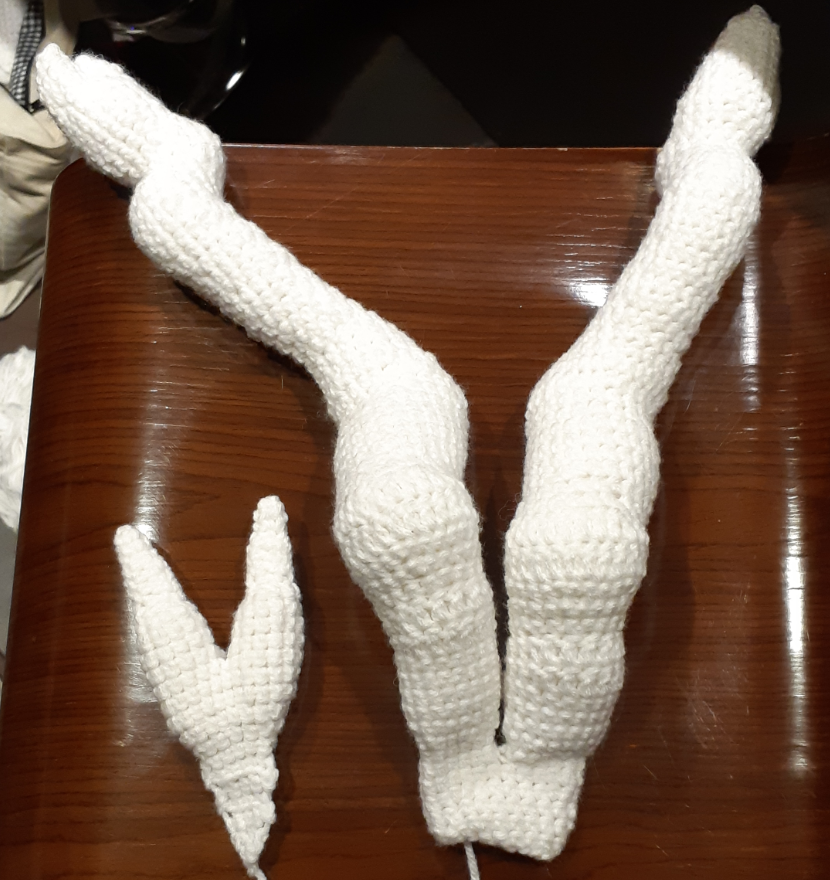
The legs were the beginning of the more complicated sections; I made 4 separate cones, crocheted them together, then shaped the bottom half to make the thigh, leg, and foot. I used the “increase set” on one half of the round, followed immediately by the “decrease set” on the other half; this created a lop-sided shifting of the rounds, which shaped the joints on the legs. I only thought about this method after testing the Houndour pattern; it seems to be a really useful technique.

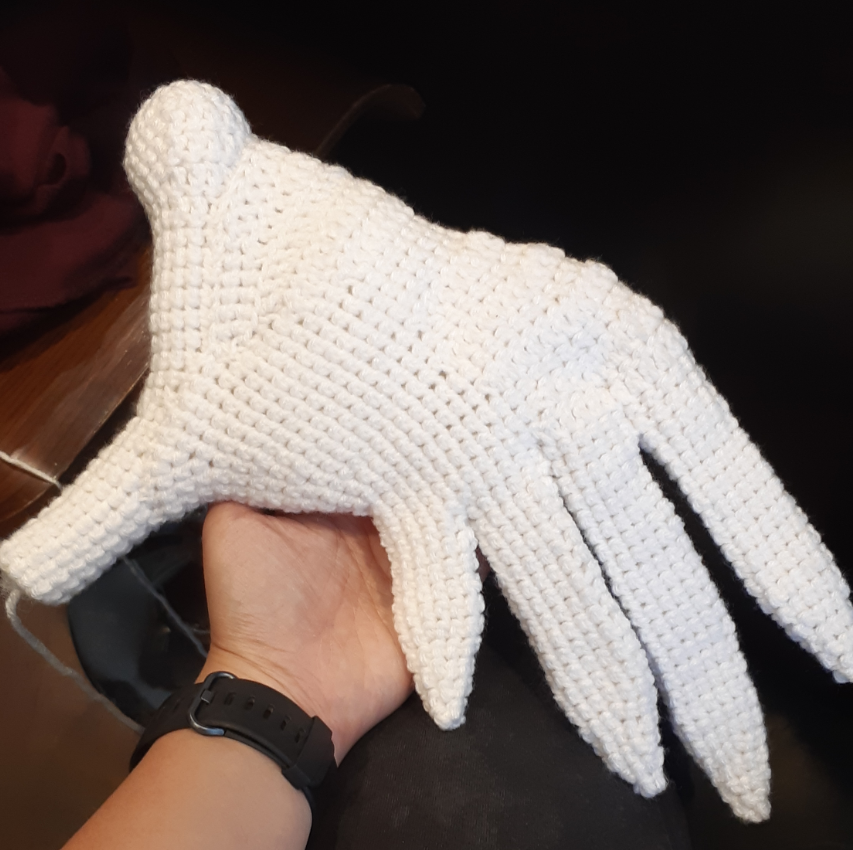
The wing tips were made with a similar method: make a few cones, crochet together, then shape with increase and decrease sets on the same round. I also interrupted the round with a row wedged between two complete rounds, making a steeper angle on the fabric edge.
I used chaining to produce the smaller fluffs; I chained a certain amount, crocheted back to the end of the chain and chained some more to repeat the process. When two copies were sewn together, it created a nice puffy piece that wasn’t too bulky.
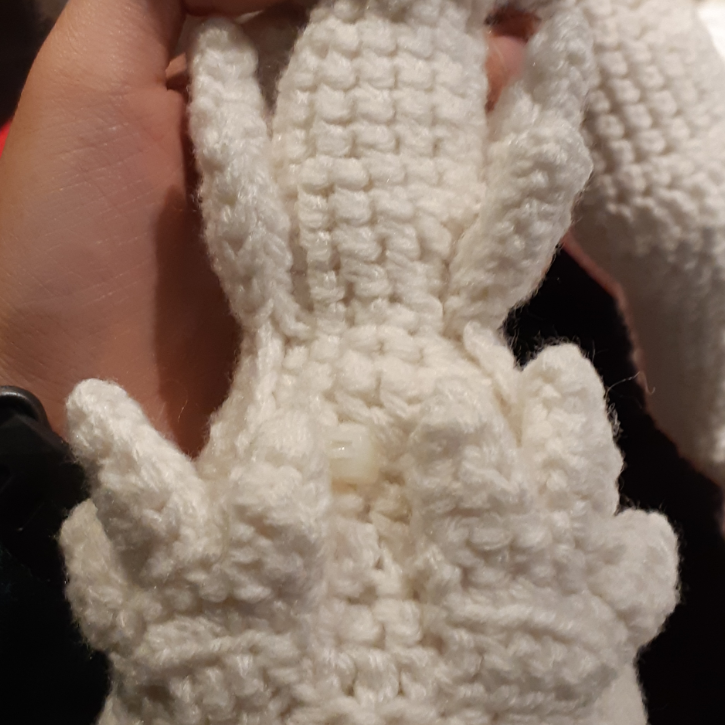
The ears were also a collection of pieces, including a bunch of slender fluff pieces for the top fluff layer and the cloud-like ears as the middle layer. It ended up weighing a lot, making it impossible to have the neck support the head on its own.
To fix this, I used four zip ties to act as an inner structure for the neck. I could slide them from the top of the head, to around the base of the neck; once I had them in a good position, I could hold it in place with another zip tie. To do this, I placed the second zip tie pointing in the opposite direction; it allowed me to fasten them together.


The zip ties in the neck allowed for neck support, while having flexibility within. I was able to hide the ends with the added details. The only thing to be aware of is to avoid over tightening the ties, so that the plush can remain at its proper bulk.


The details kept piling up each time I made more pieces. The biggest detail I noticed was that the tail was surrounded by a “cone of shame”, which was surrounded by 6 feather fragments and two grey rings. At this point, my large ball of yarn had shrunk to about a little less than half its size. I wasn’t sure if it was going to be enough. To save on yarn, I made most pieces of the tail cone as a single flat layer. I managed to have some yarn remaining after all of these parts were made, but know that I started this project with a fresh giant ball of yarn.

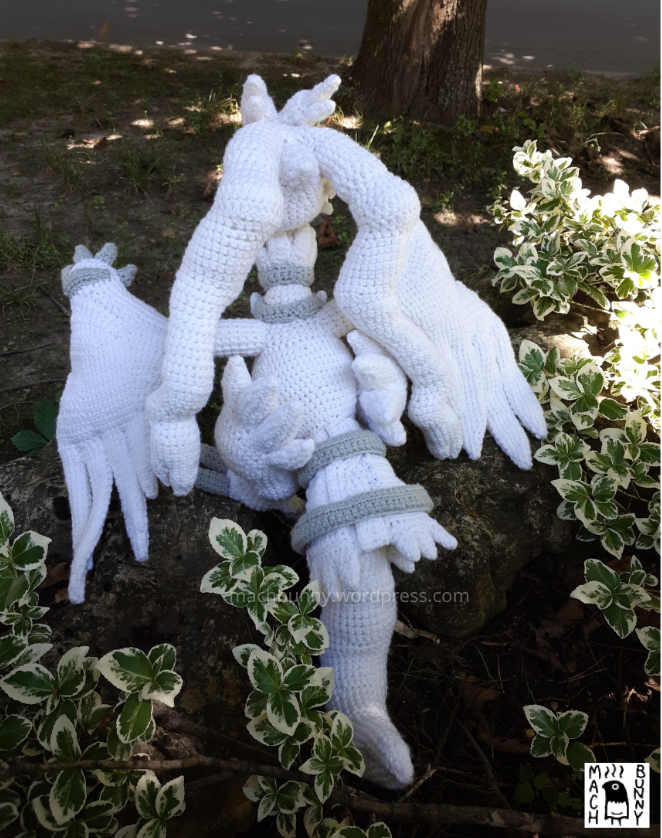
With all the pieces made, it was very satisfying to put all of them together onto the body; I laid it out in excitement!

After two weeks, I finally have the final result:


Thanks for reading! Next week I’m going back to a smaller pokemon, probably.

HABEN SIE AUCH EINE SCHRIFTLICHE ANLEITUNG FÜR Pokemon Amigurumi: Reshiram.ICH WÜRDE MICH FREUEN WENN SIE EINE ANLEITUND DAFÜR HABEN. WOLTE EINEM KLEINEN JUNGEN EINE FREUDE MACHEN.
LikeLike
Hey there, I’m glad to hear that this pokemon is a favourite! Unfortunately, I have not written a pattern that can be used at the moment. I’m hoping one day I can get to make it available
LikeLike