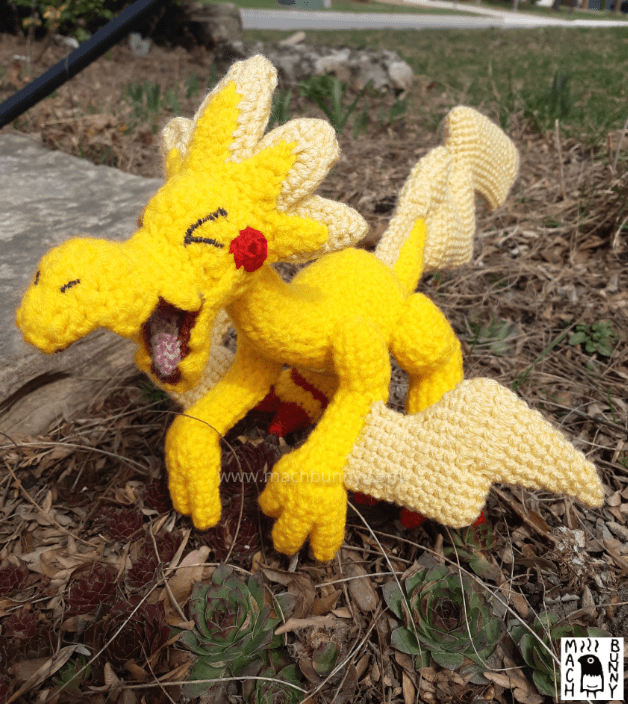
These weeks have been rather chaotic, but with working at home, I have completed the amigurumi Velozolt!
This guy is technically a pseudo-pokemon; the head and limbs are official pokemon parts, but the tail and legs were imagined in 3D by @itslocko, who based it off of a design by @gerph_art. Every time I see the official fossil pokemon from Sword and Shield, they are such sad-looking abominations. I still like them though (except maybe the upside-down head fish, Arctovish).

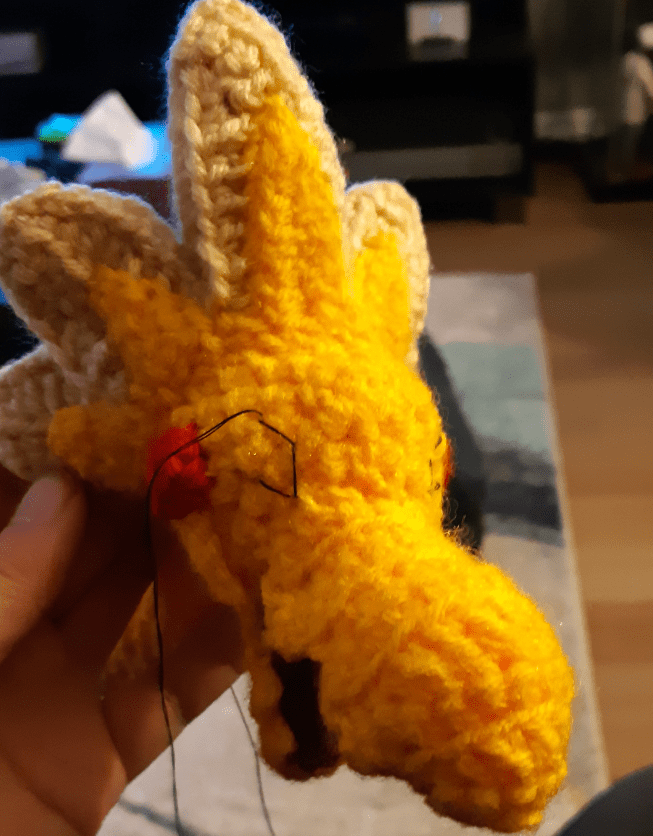
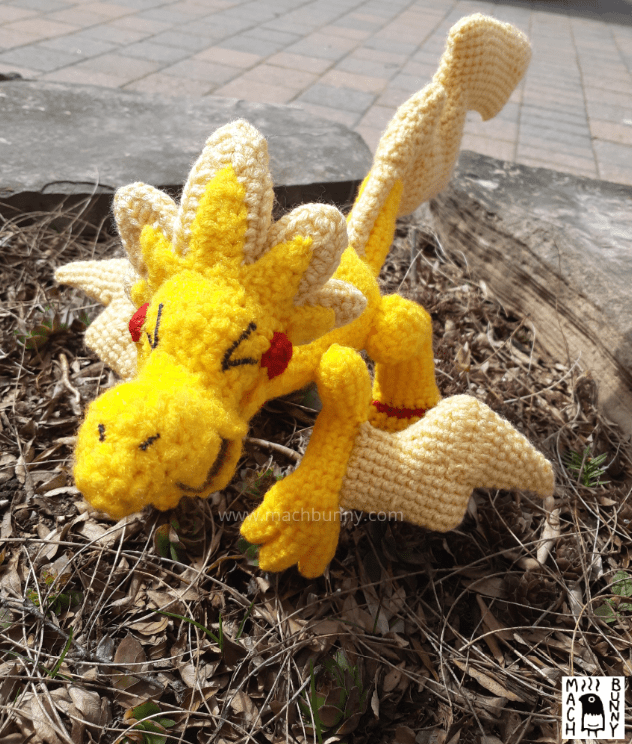
Beginning with the base body, I made the head, neck, body, and then the tail taper at the end. I think the tail ended up a bit too long, but it turned out to be good for the overall structure in the end. Once the base body was completed, the face details were the next parts to focus on.

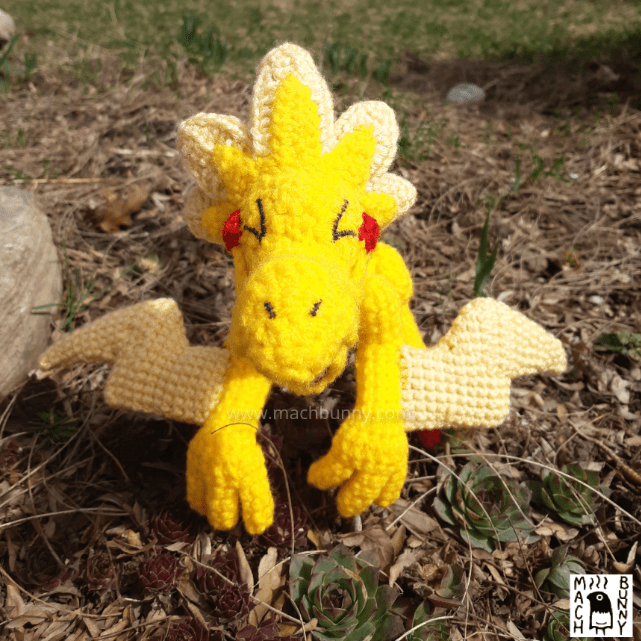
My go-to for making any long-necked creature seems to have the face connected to the spherical part of the body base. In this case, the face consists of two mouth flaps, the inner mouth flap and tongue, a string of inner frills and another string of smaller outer frills.


The lower jaw piece was made with long sides, so that it would produce that grin from the official “zolt” part of the pokemon. Add a couple cheeks and stitched details, and the face was complete.


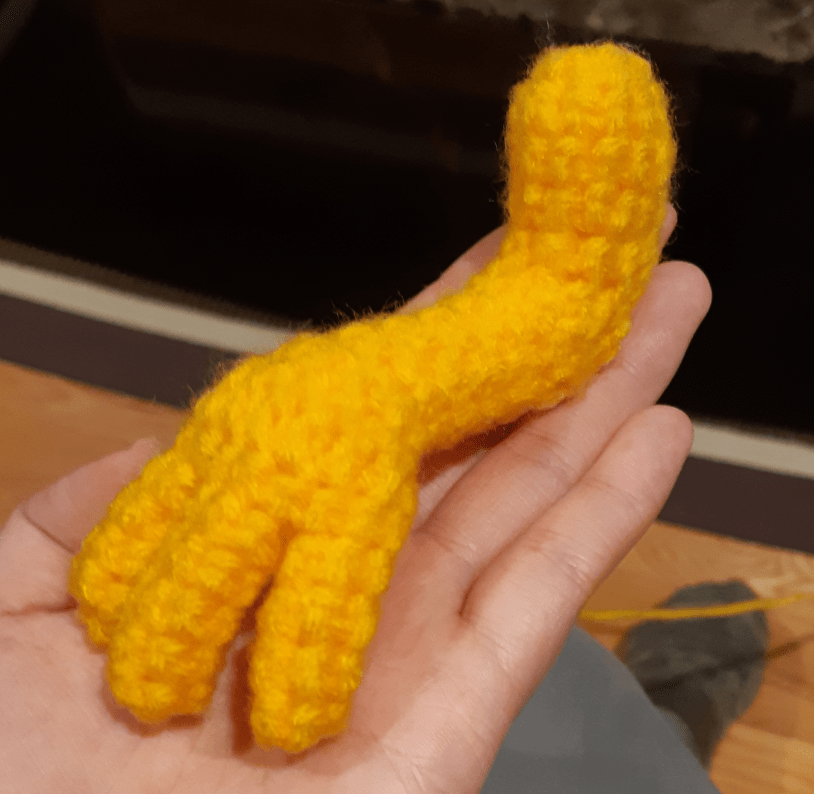
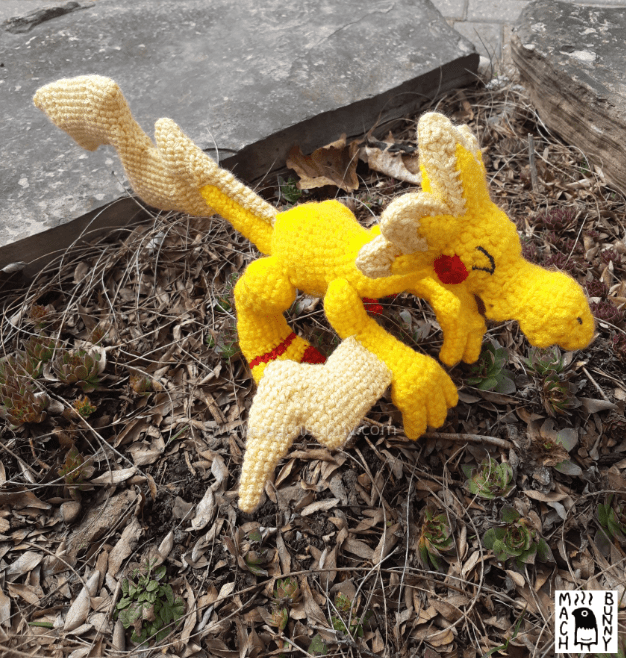
Arms and feet were mostly straightforward in construction; the arms were made with the usual combination of three finger pieces tapered into the arm shape, while the legs were similarly made with combining three toe pieces together into one leg piece. The sharpness in the shape can be influenced by the technique; a gentle bend can be produced with a combination of single and double crochets in the same round, and a sharper bend is produced using the equal – parts increase and decrease within the same round method. I also crochet on the opposite side of the round to shape it even more dramatically.
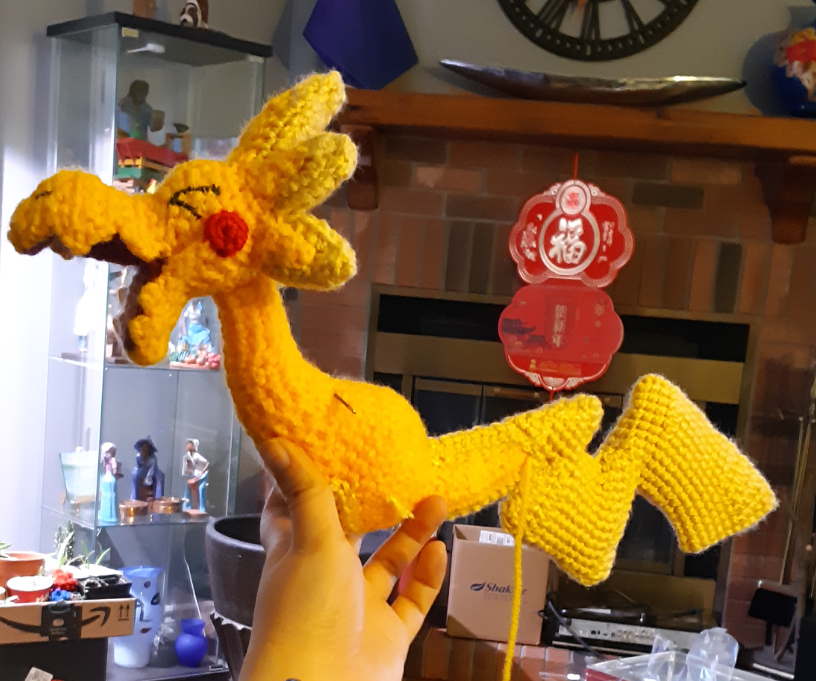
Finally, the bolt details were made, similarly to the fins on the giant Gyarados. I like shaping the pieces in a “sort-of round” configuration; it allows the shape to be made without seams, which is my preference when I make pieces. Often the results are not as sharp, unless you use a single chain as the round shape by stitching both sides of the chain. The arm bolts were no trouble when made with this method.

The same could not be said for the tail portion; the tail had to be re-modified from the first attempt, because the split section did not turn out as triangular as I hoped. I had to start the split sooner to correct the shape.

Once all of the pieces were made and assembled, it took me a while to photograph the final result; despite having to work at home, it’s still fairly busy with my workplace, and I am spending good time with my new bird, Bick. He’s very cuddly and could probably be a great couch buddy.
Here’s the final result:

Thanks for reading, and stay healthy!
